Infant Optics DXR-8AC
Infant Optics DXR-8 Add-on Camera Instruction Manual
Model: DXR-8AC
Produkt ponadview
This manual provides essential information for the Infant Optics DXR-8 Add-on Camera, designed to expand your existing Infant Optics DXR-8 (3.5" model) video baby monitor system. This camera is niekompatybilny with the DXR-8 PRO (5.0" model).
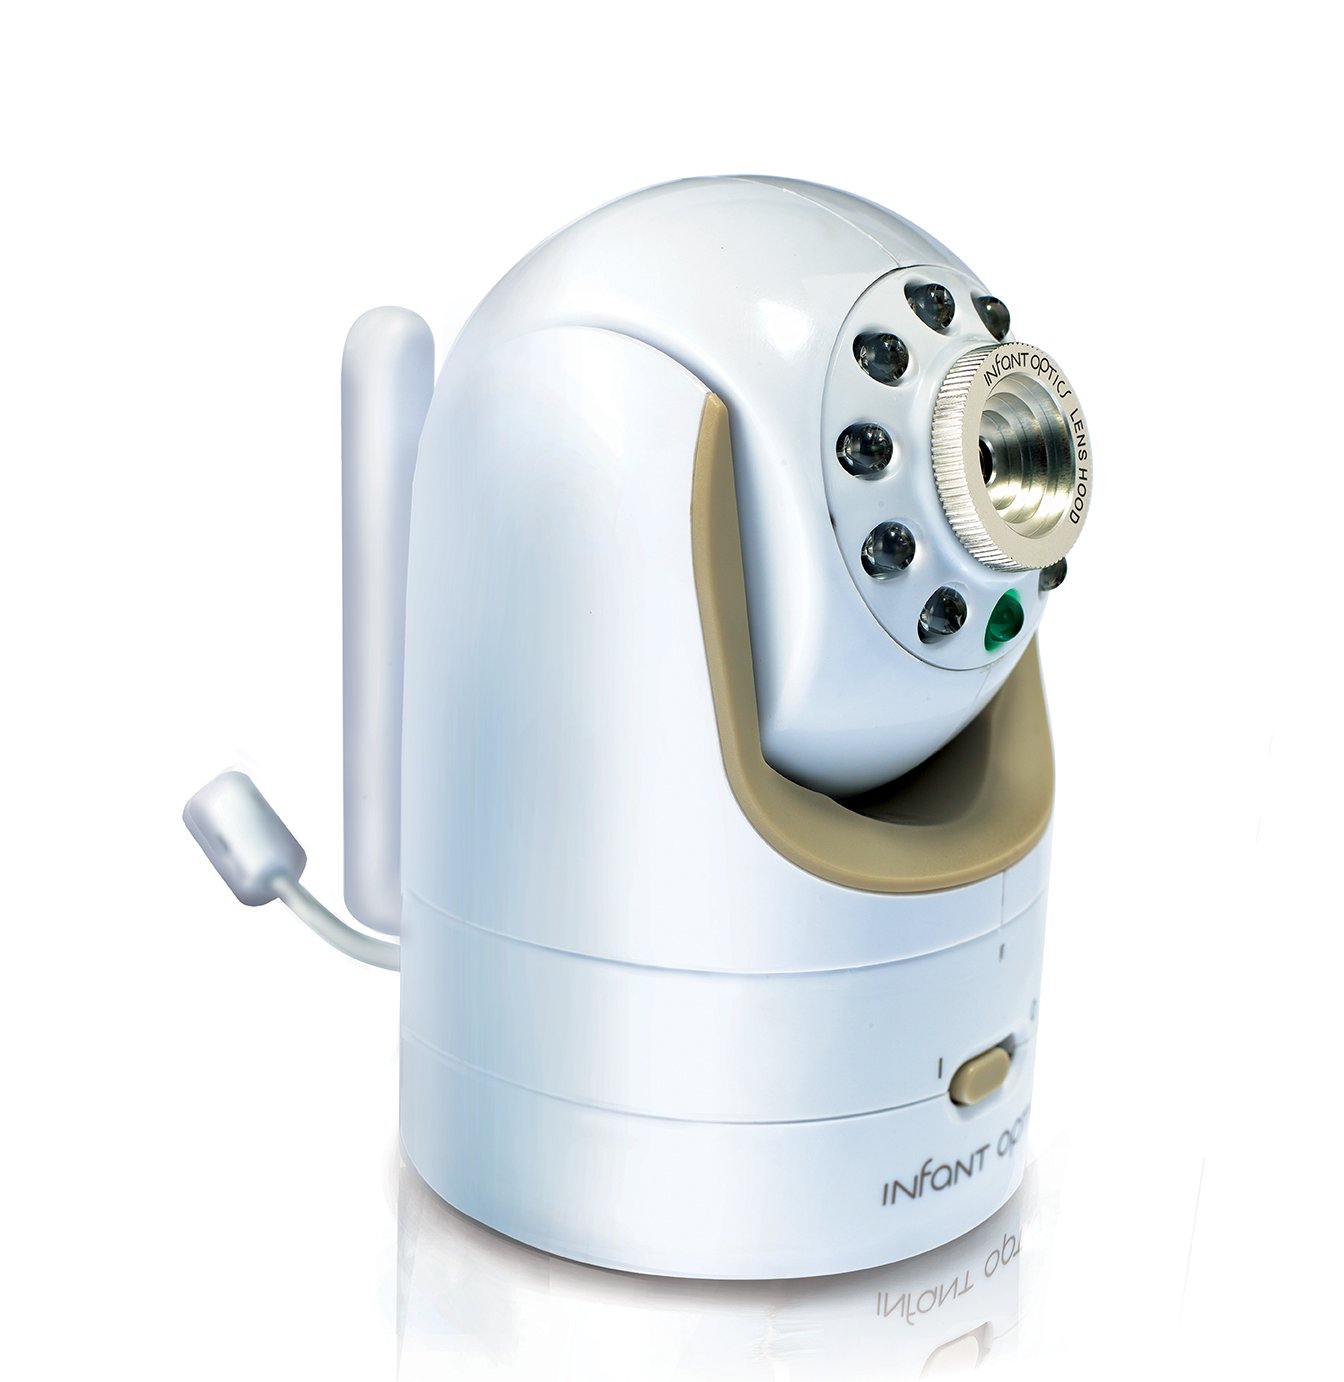
Figure 1: Infant Optics DXR-8 Add-on Camera Unit.
The DXR-8 Add-on Camera features remote pan/tilt/zoom capabilities, night vision, and a remote thermometer. It supports interchangeable optical lenses (zoom and wide-angle lenses sold separately). You can expand your DXR-8 monitor system with up to 4 camera units.
Ważne informacje dotyczące bezpieczeństwa
Ryzyko uduszenia:
- Always keep the power adapter cord out of your child's reach.
- To prevent entanglement, NIE place the camera unit or its adapter cord within reach of your child.
Co jest w pudełku
- Camera Unit (DXR-8AC)
- Zasilacz do jednostki kamery

Figure 2: Included Camera Unit and Power Adapter.
Instrukcje konfiguracji
1. Zasilanie kamery
- Connect the small end of the power adapter to the DC-in port on the back of the camera unit.
- Podłącz drugi koniec zasilacza do standardowego gniazdka elektrycznego.
- Ensure the camera's power switch (located on the bottom front) is in the 'ON' position (I).

Rycina 3: Przód view of the camera, showing the power switch.
2. Pairing with Your DXR-8 Monitor Unit
The DXR-8 Add-on Camera is designed to pair seamlessly with your existing Infant Optics DXR-8 (3.5" model) monitor unit. The pairing process typically takes only a few seconds.
- Ensure both your DXR-8 monitor unit and the new add-on camera unit are powered on.
- On your DXR-8 monitor unit, navigate to the camera pairing menu. (Refer to your DXR-8 monitor's instruction manual for specific steps on accessing the pairing menu).
- Press and hold the pairing button on the back of the add-on camera unit until the monitor unit indicates successful pairing.
- Once paired, the camera's video feed will appear on your monitor.
The DXR-8 monitor unit can support up to 4 camera units. If you are adding more than one camera, you can assign each camera to a different channel on your monitor.
Obsługa aparatu
Zdalne przesuwanie, pochylanie i powiększanie
The DXR-8 Add-on Camera offers remote control over its pan, tilt, and digital zoom functions directly from your DXR-8 monitor unit. This allows you to adjust the camera's view without physically entering the room.

Figure 4: Camera's pan (270°) and tilt (120°) capabilities.
- Chleb: Przesuń kamerę poziomo w zakresie do 270 stopni.
- Przechylenie: Przesuń kamerę w pionie o maksymalnie 120 stopni.
- Brzęczenie: Digitally zoom in on the image for a closer view.
Refer to your DXR-8 monitor's manual for detailed instructions on using the pan, tilt, and zoom controls.
Wizja nocna
The camera is equipped with automatic infrared night vision, allowing you to see clearly in low-light or dark conditions. The camera will automatically switch to night vision mode when the ambient light is insufficient.
Zdalny termometr
The camera unit includes a built-in thermometer that transmits the room temperature to your DXR-8 monitor unit, helping you ensure a comfortable environment for your child.
Wymienne soczewki
The DXR-8 Add-on Camera supports interchangeable optical lenses. The standard lens is pre-installed. Optional zoom and wide-angle lenses are sold separately and can be easily swapped to suit your monitoring needs.

Figure 5: Diagram showing the interchangeable lens feature.
To change a lens, gently twist the current lens counter-clockwise to remove it. Align the new lens with the camera's lens mount and twist clockwise until secure.
Konserwacja
- Czyszczenie: Do czyszczenia kamery należy używać miękkiej, suchej ściereczki. Nie należy używać środków czyszczących o właściwościach ściernych ani rozpuszczalników.
- Pielęgnacja soczewek: If the lens requires cleaning, use a lens cleaning cloth specifically designed for optical surfaces.
- Składowanie: Jeśli przechowujesz kamerę przez dłuższy czas, odłącz ją od zasilania i przechowuj w chłodnym, suchym miejscu.
Rozwiązywanie problemów
| Problem | Możliwa przyczyna | Rozwiązanie |
|---|---|---|
| Brak obrazu z kamery. | Camera not powered on or not paired. | Ensure camera power switch is ON. Re-pair the camera with the monitor unit (refer to Setup Instructions). |
| Słaba jakość wideo. | Obstruction, distance, or dirty lens. | Ensure clear line of sight between camera and monitor. Reduce distance if possible. Clean the camera lens. |
| Remote pan/tilt/zoom not responding. | Interference or camera not fully connected. | Move camera closer to monitor. Power cycle both camera and monitor. |
| Odczyt temperatury jest niedokładny. | Camera placed near heat source/vent. | Relocate the camera to a more central location in the room, away from direct sunlight, vents, or heating elements. |
Specyfikacje
| Funkcja | Szczegół |
|---|---|
| Numer modelu | DXR-8AC |
| Compatible Monitor | Infant Optics DXR-8 (3.5" model) |
| Źródło zasilania | AC/DC Adapter (Included) |
| Technologia łączności | Wireless (Non-Wi-Fi for secure connection) |
| Rozdzielczość przechwytywania wideo | 480p |
| Pan Angle | Do 270 stopni |
| Kąt nachylenia | Do 120 stopni |
| Wizja nocna | Automatyczna podczerwień |
| Zawarte komponenty | Camera Unit, Power Adapter |
| Wymiary (dł. x szer. x wys.) | 2.5 x 2.5 x 4 cala |
| Waga przedmiotu | 8 uncji (około 0.5 funta) |
| Kolor | Biały/Beżowy |
| UPC | 858779002516 |
Gwarancja i wsparcie
For information regarding product warranty, technical support, or to purchase additional accessories (such as zoom or wide-angle lenses), please visit the official Infant Optics webodwiedź witrynę lub skontaktuj się bezpośrednio z działem obsługi klienta.
Możesz również odwiedzić Infant Optics Store on Amazon Aby uzyskać więcej informacji o produkcie i zasobach pomocy.