Ważne informacje dotyczące bezpieczeństwa
Please read and understand all instructions before using the laminator. Keep this manual for future reference.
- Nie używaj laminatora, jeśli przewód zasilający lub wtyczka są uszkodzone.
- Trzymaj laminator z dala od wody i innych płynów.
- Do not insert metal objects into the laminator.
- Podczas pracy maszyny należy zapewnić odpowiednią wentylację wokół niej.
- Odłącz laminator od prądu, gdy nie jest używany lub przed czyszczeniem.
- Urządzenie to nie jest przeznaczone do użytku przez osoby (w tym dzieci) o ograniczonej sprawności fizycznej, sensorycznej lub umysłowej, a także osoby nieposiadające odpowiedniego doświadczenia lub wiedzy, chyba że znajdują się one pod nadzorem osoby odpowiedzialnej za ich bezpieczeństwo lub otrzymały od niej instrukcje dotyczące korzystania z urządzenia.
Produkt ponadview
The Amazon Basics 9-Inch Thermal Laminator is designed for home, office, or classroom use, providing high-quality lamination for various document sizes.
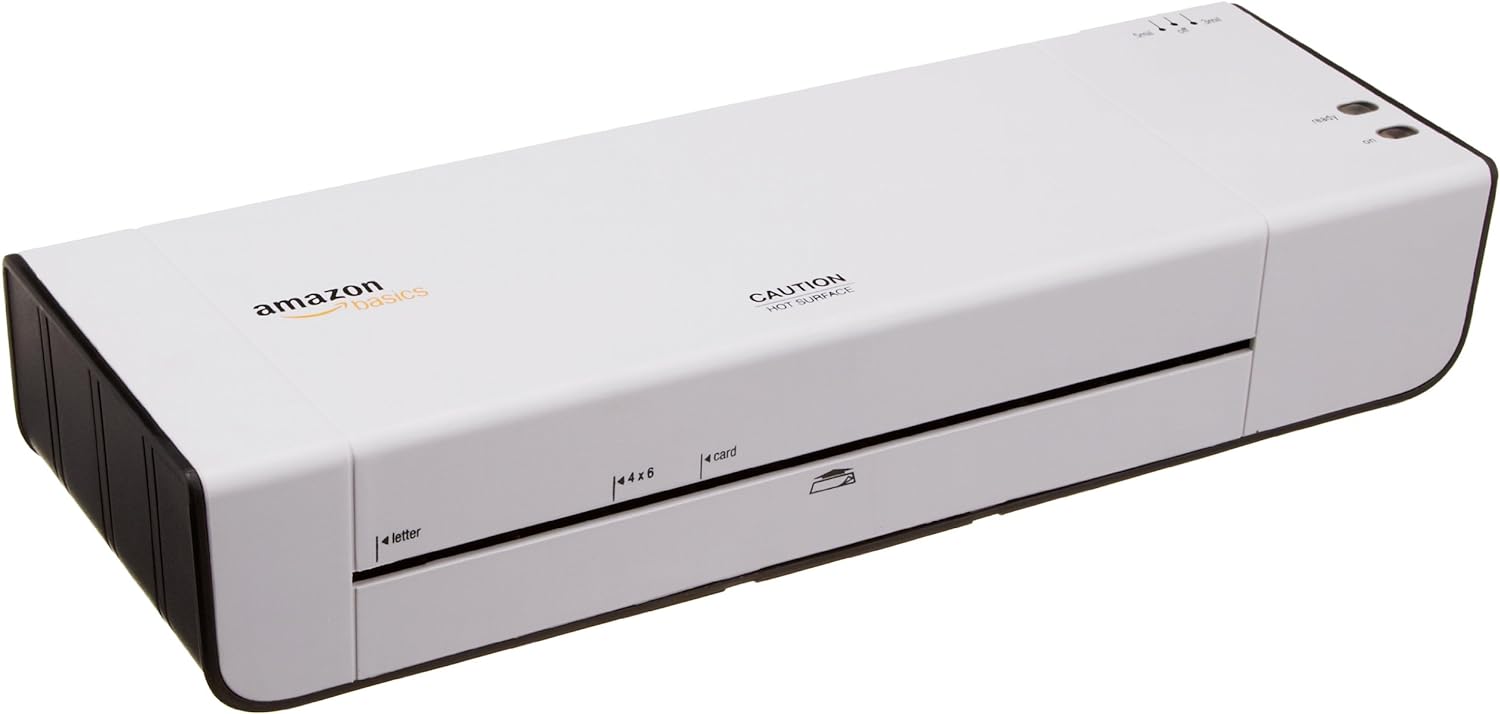
Rycina 1: Przód view of the Amazon Basics 9-Inch Thermal Laminator Machine, showing the feed slot and branding.
Główne cechy:
- Laminates documents up to 9 inches wide.
- Two heat settings: 3 mil and 5 mil.
- Quick 4-minute warm-up time.
- Jam release lever for easy clearing.
- Kompaktowa konstrukcja.
Organizować coś
Rozpakowywanie:
Carefully remove the laminator from its packaging. Retain the packaging for future storage or transport.
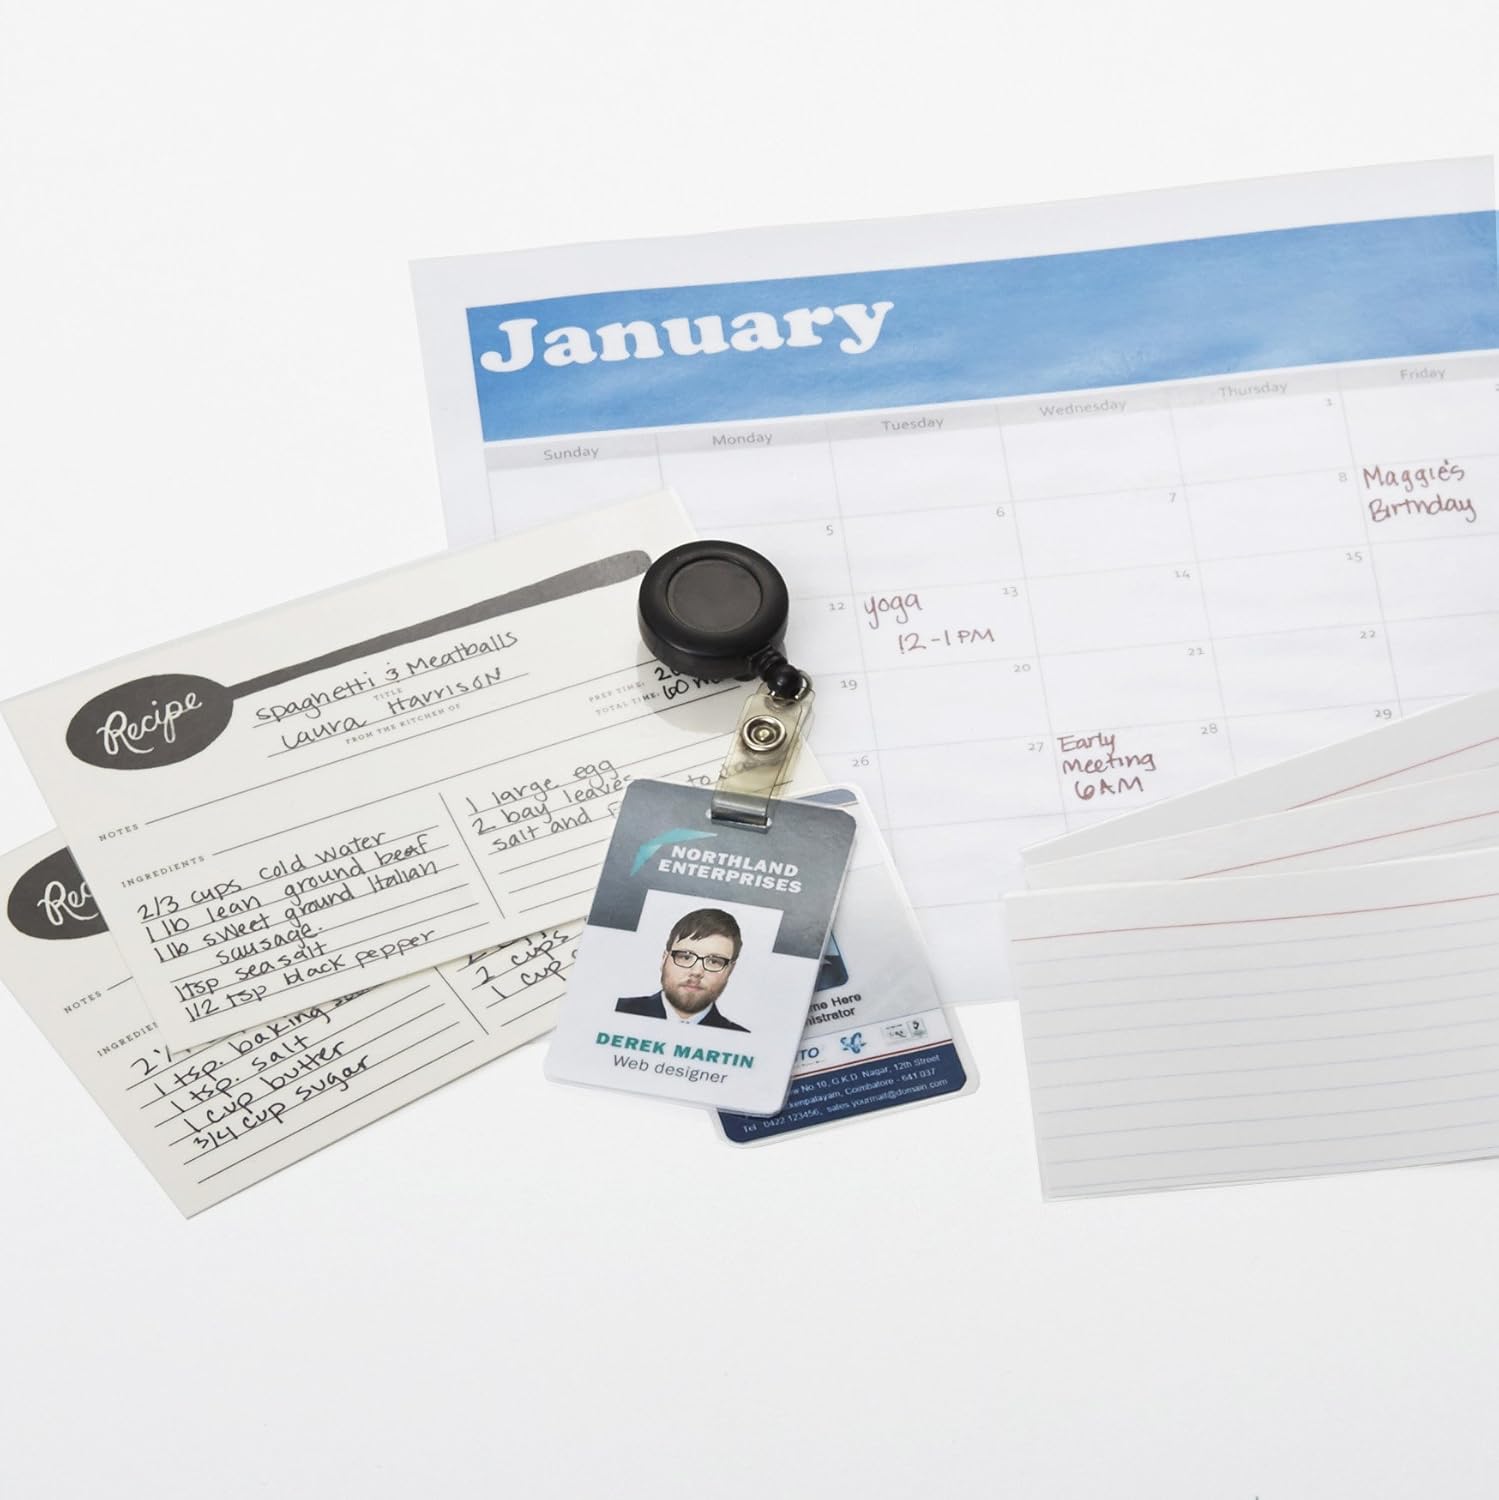
Figure 2: The laminator machine as it appears inside its frustration-free packaging.
Umieszczenie:
Place the laminator on a flat, stable, and heat-resistant surface. Ensure there is adequate space around the machine for proper ventilation and for documents to exit the rear.
Podłączenie zasilania:
Plug the power cord into a standard electrical outlet. The power switch is located on the side of the unit.

Rysunek 3: Zbliżenie view of the power switch, 3mil/5mil heat settings, and release lever on the side of the laminator.
Instrukcja obsługi
Laminating a Document:
Włączanie i rozgrzewanie:
Turn the power switch to the "On" position. The "Ready" indicator light will illuminate once the machine has warmed up (approximately 4 minutes).
Wybierz ustawienie ogrzewania:
Choose the appropriate heat setting based on the laminating pouch thickness:
- 3 mil: For normal documents, photos, and card stock.
- 5 mil: For thinner papers.
Przygotuj dokument:
Place the document inside a laminating pouch, ensuring it is centered and there is an even border around the edges. Use the included 3 mil thick, 8.9 by 11.4 inch laminating pouches or any compatible 3 mil or 5 mil pouch.

Rysunek 4: Example of laminating recipe cards, showing the document being fed into the laminator.
Włóż woreczek:
Carefully insert the sealed edge of the laminating pouch into the laminator's feed slot. The machine will automatically pull the pouch through.

Figure 5: A calendar page being laminated, demonstrating the machine's ability to handle various document types.
Pobierz zalaminowany dokument:
Once the pouch exits the rear of the machine, allow it to cool on a flat surface before handling to ensure proper sealing.

Figure 6: A collection of laminated items, including recipe cards, ID badges, and a calendar, showcasing the versatility of the laminator.
Konserwacja
Czyszczenie:
Przed czyszczeniem upewnij się, że laminator jest odłączony od zasilania i całkowicie ostygł. Przetrzyj obudowę miękką, miękką szmatką.amp ściereczka. Nie należy używać środków czyszczących o właściwościach ściernych ani rozpuszczalników.
Roller Cleaning (Optional):
Periodically, you may run a cleaning sheet (available separately) through the laminator to remove any adhesive residue from the rollers.
Składowanie:
Store the laminator in a cool, dry place when not in use. Ensure the power cord is neatly wrapped and not kinked.
Rozwiązywanie problemów
| Problem | Możliwa przyczyna | Rozwiązanie |
|---|---|---|
| Laminator nie włącza się. | Niepodłączony; wyłączony; brak zasilania w gniazdku. | Check power cord connection; ensure power switch is "On"; test outlet with another device. |
| Torebka zacina się w maszynie. | Pouch inserted incorrectly; pouch too thick; foreign object. | Naciśnij dźwignia zwalniająca to clear the jam. Ensure pouch is inserted sealed edge first and is within specified thickness (3 or 5 mil). |
| Laminacja jest mętna lub zawiera pęcherzyki powietrza. | Incorrect heat setting; machine not fully warmed up; low-quality pouch. | Ensure correct heat setting (3 mil for normal, 5 mil for thinner); wait for "Ready" light; use high-quality laminating pouches. |
| Laminowanie nie jest odpowiednio uszczelnione. | Incorrect heat setting; machine not fully warmed up; document too thick for pouch. | Verify heat setting; wait for "Ready" light; ensure document fits pouch with adequate border. |
Specyfikacje
| Funkcja | Szczegół |
|---|---|
| Numer modelu | PL9-US |
| Szerokość laminowania | Do 9 cali |
| Ustawienia ciepła | 3 mil, 5 mil |
| Czas rozgrzewki | Około 4 minut |
| Liczba rolek | 2 |
| Waga | 1.2 kilogramów |
| Zasilacz | Standardowa klimatyzacja |
Gwarancja i wsparcie
For warranty information and customer support, please visit the official Amazon Basics webodwiedź witrynę lub skontaktuj się bezpośrednio z obsługą klienta Amazon.
Wsparcie online: Amazon Basics Store
Note: Reading the full user manual is recommended prior to the first use of this product.