
Wstęp
This manual provides detailed instructions for the installation, operation, and maintenance of your Lightkiwi E7574 Dimmable LED Under Cabinet Lighting 4 Panel Kit. Please read this manual thoroughly before installation and retain it for future reference.
Informacje dotyczące bezpieczeństwa
- Przed instalacją, serwisowaniem lub czyszczeniem urządzenia należy zawsze odłączyć je od zasilania.
- This product is designed for indoor use only. Do not expose to water or moisture.
- Upewnij się, że wszystkie połączenia są bezpieczne i zgodne z lokalnymi przepisami elektrycznymi.
- Do not attempt to modify the product. Any modifications may void the warranty and create safety hazards.
- The product is UL-Listed, indicating it meets specific safety standards.
Zawartość opakowania
Sprawdź, czy w Twoim pakiecie znajdują się wszystkie wymienione poniżej elementy:
- 4 x 12-inch LED Light Panels
- 1 x 12 Watt Power Supply
- 1 x Dimmer Switch
- 1 x 4-Way Splitter
- Złącza modułowe
- Mounting Brackets with Screws
- 3ft Interconnect Cables
Obraz: Ponadview of the Lightkiwi E7574 kit components, including LED panels, power supply, dimmer switch, 4-way splitter, modular connectors, mounting brackets, and interconnect cables.
Cechy produktu
- Professional Grade Lighting: Provides clear, vivid, and distinguishable light while consuming less energy.
- Możliwość przyciemniania: Features continuous 0% - 100% flicker-free dimming with the included inline electric dimmer switch.
- Rozszerzalna konstrukcja: The modular LED under cabinet lighting kit can be expanded by using a power supply with higher wattage, allowing for increased configuration without overburdening the product.
- Posiada certyfikat UL: Panels and power supply are UL-Listed, ensuring compliance with regulatory safety requirements.
- Funkcja pamięci: The dimmer switch retains its previous brightness and power settings, making it compatible with wall on/off switches or plug-in timers.
- Niski Profile: Ultra-thin design (0.35 inches) with an aluminum body for durability.
Konfiguracja i instalacja
1. Planowanie układu
Before installation, determine the desired placement of each LED panel. Consider the length of interconnect cables and the location of the power outlet and dimmer switch.
2. Łączenie komponentów
Connect the LED panels to each other using either the modular connectors for a continuous strip or the 3ft interconnect cables for spacing between panels. Connect the assembled panels to the 4-way splitter, then connect the dimmer switch to the splitter, and finally the power supply to the dimmer switch. Ensure all connections are firm.

Image: Connection options for LED panels, illustrating the use of interconnect cables and modular connectors.
3. Mounting the LED Panels
You have two primary options for mounting the LED panels:
- Mounting Brackets with Screws (Permanent Use): Secure the mounting brackets to your desired surface using the provided screws. Snap the LED panels into the brackets.
- Double-Sided Adhesive Tape (Temporary Use): Apply double-sided adhesive tape (not included, but often used for temporary installations) to the back of the LED panels and press them firmly onto the surface.

Image: Installation options for LED panels, detailing bracket mounting and adhesive tape application.
4. Hardwire Installation (Optional)
If you intend to use a wall dimmer switch (110V), a hardwire installation with a dimmable 24VDC transformer is required. The included plug-in power supply is not compatible with 110V wall dimmer switches due to voltage differences. If a 24V dimmer switch is used with a plug-in power supply, you may need to splice the power plug from the power cord and connect it to the power source using a junction box or similar method. Consult a qualified electrician for hardwire installations.
Instrukcja obsługi
Using the Dimmer Switch
- Włączanie/wyłączanie: Press the power button on the dimmer switch to turn the lights on or off.
- Ściemnianie: Use the 'DIMMER' buttons (up and down arrows) to adjust the brightness level from 0% to 100%.
- Funkcja pamięci: The dimmer switch will recall the last brightness setting when turned back on, even if power is interrupted by a wall switch or timer.
Konserwacja
- Czyszczenie: Ensure the power is off before cleaning. Wipe the LED panels and other components with a soft, dry cloth. Do not use abrasive cleaners or solvents.
- Kontrola: Periodically check all connections for tightness and ensure no cables are pinched or damaged.
- No user-serviceable parts are inside the LED panels or power supply.
Rozwiązywanie problemów
| Problem | Możliwa przyczyna | Rozwiązanie |
|---|---|---|
| Światła nie włączają się. | No power to the unit; loose connections; faulty dimmer switch or power supply. | Check power outlet; ensure all cables are securely connected; test with a different power supply or bypass dimmer if possible. |
| Światła niespodziewanie migoczą lub przygasają. | Loose connections; incompatible power supply wattage; dimmer malfunction. | Verify all connections; ensure power supply wattage matches requirements; replace dimmer switch if necessary. |
| Dimmer switch not responding. | Dimmer switch not properly connected; faulty dimmer switch. | Check dimmer connections; replace dimmer switch. |
Specyfikacje
| Funkcja | Szczegół |
|---|---|
| Numer modelu | E7574 |
| Kolor światła | Ciepła biel (3000 kelwinów) |
| Jasność | 1120 Lumen (Total for 4 panels) |
| Cotage | 12 Watts (Total for 4 panels) |
| Tomtage | 24 woltów prądu stałego |
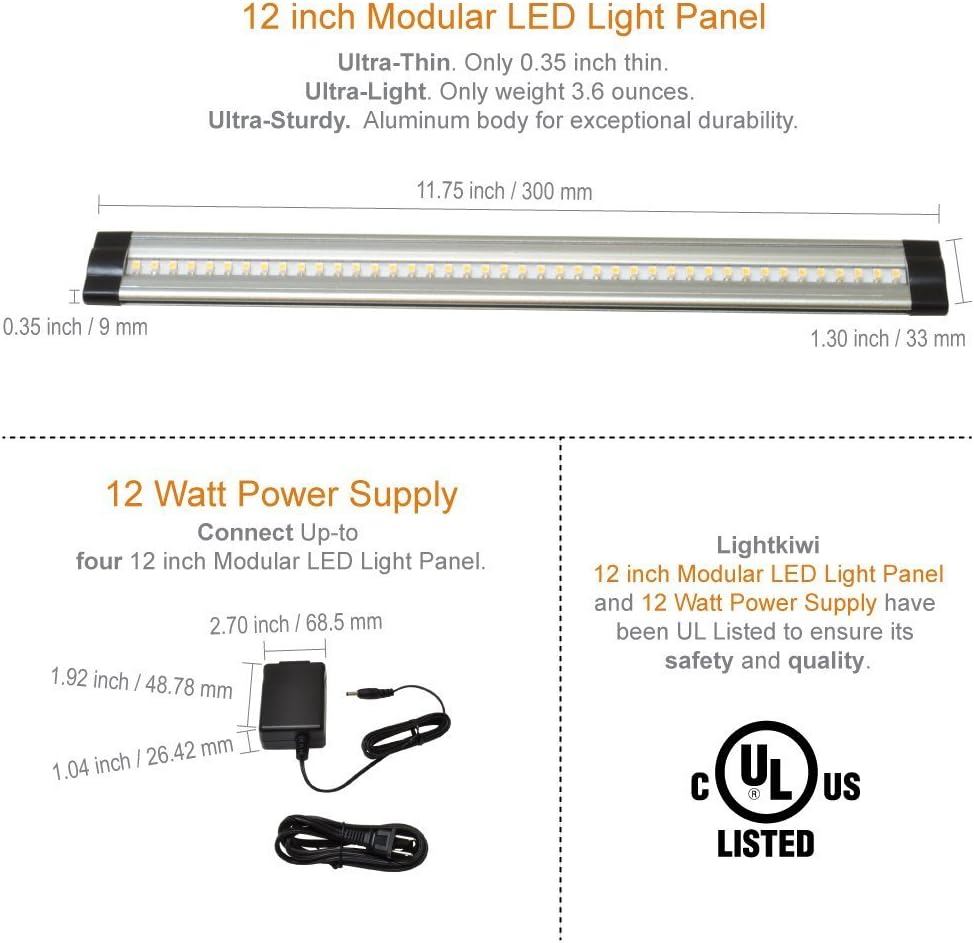
| Panel Dimensions (Each) | 11.75 cali (dł.) x 1.30 cali (szer.) x 0.35 cali (wys.) |
| Wymiary zasilacza | 2.70 cali (dł.) x 1.92 cali (szer.) x 1.04 cali (wys.) |
| Tworzywo | Aluminum Body (Panels), Plastic (Shade) |
| Orzecznictwo | Posiada certyfikat UL |
| Metoda kontroli | Push Button Dimmer Switch |
| Zastosowanie wewnątrz/na zewnątrz | Wnętrz |
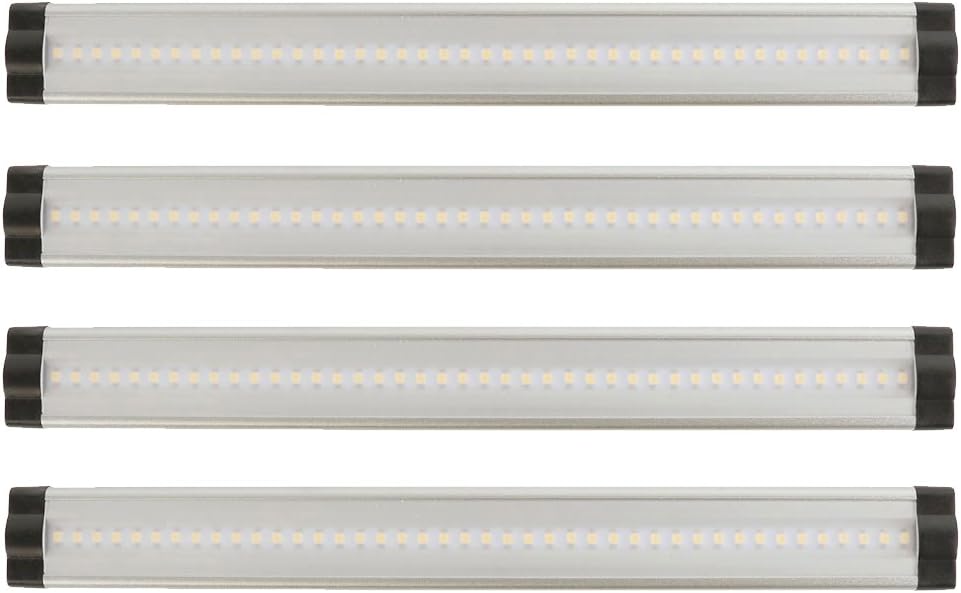
Image: Detailed dimensions of the 12-inch LED light panel and the 12-watt power supply, highlighting their ultra-thin and ultra-light design, and UL certification.
Informacje o gwarancji
This Lightkiwi product is covered by a 3-letnia gwarancja producenta od daty zakupu. Niniejsza gwarancja obejmuje wady materiałowe i wykonawcze wynikające z normalnego użytkowania. Prosimy zachować dowód zakupu na wypadek roszczeń gwarancyjnych.
Obsługa klienta
For further assistance, technical support, or warranty inquiries, please visit the official Lightkiwi store or contact their customer service department. Refer to your product packaging or the Lightkiwi webAktualne dane kontaktowe znajdują się na stronie.