
Wstęp
The Hobart Quantum Service Scale / Printer, Model QUANTM1-1, is a versatile weighing and label printing solution designed for various service environments. Featuring wireless capabilities for flexible placement, 32 flashkeys for efficient operation, and a large label roll capacity, this scale is NSF approved and UL listed. It supports multiple barcode formats including UPC-A, EAN13, EAN128, and GS1. The unit includes a 5.7-inch LCD graphics display and an ATM-style console for user-friendly interaction. Its cassette label-loading system ensures quick and easy label stock changes, and the thermal printhead requires no ink or ribbon for simplified maintenance.
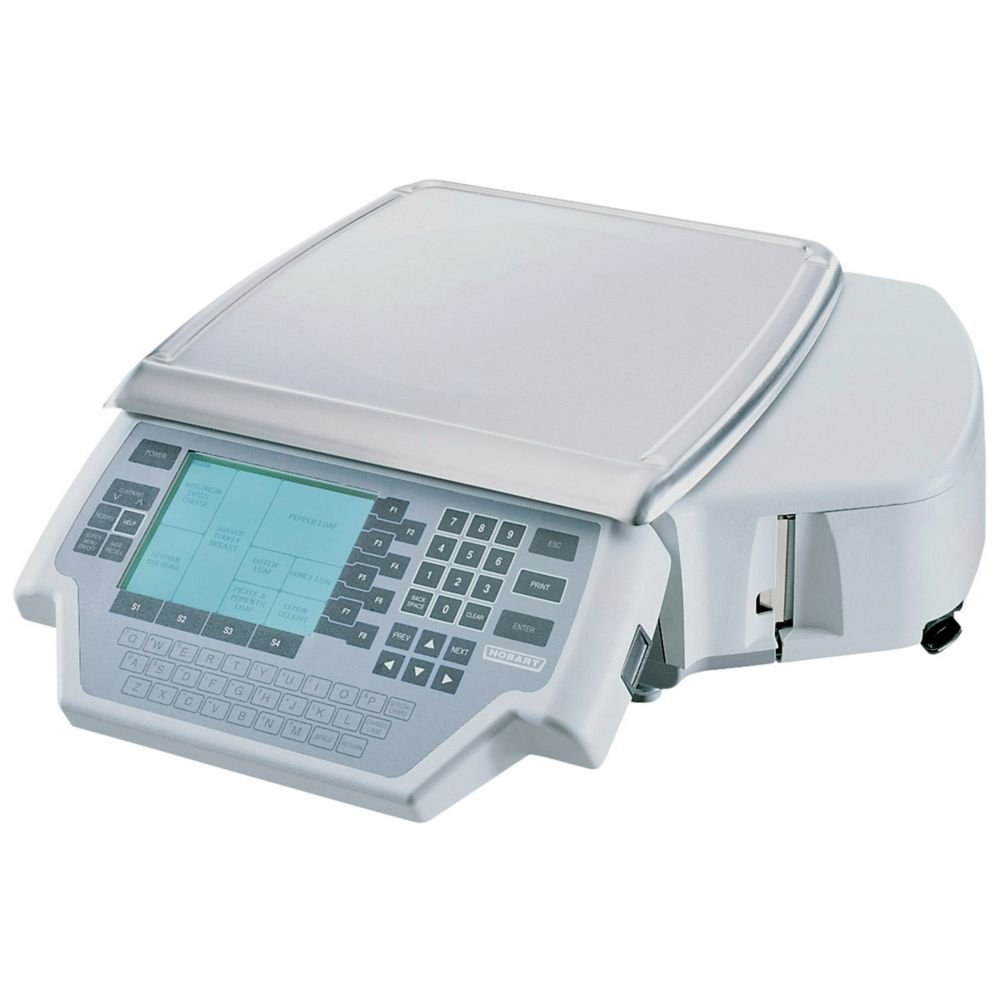
Image: Hobart Quantum Service Scale / Printer, Model QUANTM1-1. This image displays the complete scale unit with its display, keypad, and weighing platter.
Informacje dotyczące bezpieczeństwa
Please read all safety instructions before operating the Hobart Quantum Service Scale / Printer. Failure to follow these instructions may result in electric shock, fire, or serious injury.
- Ensure the scale is placed on a stable, level surface to prevent tipping and ensure accurate measurements.
- Do not expose the scale to excessive moisture or liquids. Clean with a damp tylko tkanina.
- Używaj wyłącznie zasilacza dostarczonego z urządzeniem.
- Keep hands clear of the label printer mechanism during operation.
- Nie próbuj samodzielnie demontować ani naprawiać urządzenia. Skontaktuj się z wykwalifikowanym personelem serwisowym.
Organizować coś
1. Rozpakowanie i identyfikacja komponentów
Ostrożnie wyjmij wszystkie elementy z opakowania. Sprawdź, czy wszystkie elementy są obecne:
- Hobart Quantum Service Scale / Printer main unit
- Talerz wagowy
- Przewód zasilający
- USB drive (containing software and manuals)
- Kabel Ethernetowy
- Label paper rolls (one pre-installed, one spare)
2. Montaż
Assemble the display pole and weighing platter onto the main unit as shown in the video below. Ensure all connections are secure.
Video: Label Printing Scale Installation and Demonstration. This video demonstrates the assembly of the scale, including attaching the display pole and weighing platter, and provides a basic demonstration of its functions.
3. Podłączenie zasilania
Connect the power cord to the scale and then to a suitable power outlet (120V). The scale will perform a self-test upon power-up.
4. Label Roll Installation
The scale features a cassette label-loading system. Open the magnetic door on the side of the unit, insert the label roll, and feed the paper through the designated slot. Close the door securely.
Wideo: Ponadview, Package, Function Panel and Interface. This video provides a detailed look at the scale's components, including the label roll compartment and various interface ports.
Instrukcja obsługi
1. Ważenie podstawowe
Place the item to be weighed on the center of the weighing platter. The weight will be displayed on the LCD screen. Use the 'Tare' button to zero out the weight of containers.
2. Using PLU (Price Look-Up) Keys
The scale features 32 flashkeys for quick access to frequently sold items. To use a PLU, place the item on the platter, then press the corresponding flashkey. The price and total will be calculated automatically.
3. Detailed Product Settings
The scale allows for detailed configuration of product information, including pricing, nutritional data, and other messages. Refer to the 'Detailed Product Settings' video for a step-by-step guide on how to program these features.
Video: Detailed Product Settings. This video guides users through the process of configuring various product settings on the scale, such as price and other item-specific data.
4. Drukowanie paragonów
After weighing and pricing items, press the 'Print' key to generate a receipt. The receipt will include item details, weight, unit price, and total price. The scale supports various barcode formats for labels.
Video: How to Print Receipt. This video demonstrates the process of printing a receipt after items have been weighed and priced on the scale.
Konserwacja
1. Czyszczenie
Regularly clean the weighing platter and the exterior of the scale with a soft, damp cloth. Do not use abrasive cleaners or immerse the unit in water. Ensure the display and keypad are free from dust and debris.
2. Label Roll Replacement
When the label roll is depleted, replace it with a new one following the installation steps outlined in the Setup section. Use only compatible label rolls to ensure proper printing.
3. Ogólna opieka
Avoid dropping or subjecting the scale to heavy impacts. Store the scale in a dry, temperate environment when not in use. Periodically check the power cord for any signs of damage.
Rozwiązywanie problemów
If you encounter issues with your Hobart Quantum Service Scale / Printer, refer to the following common problems and solutions:
| Problem | Możliwa przyczyna | Rozwiązanie |
|---|---|---|
| Waga nie włącza się | No power, faulty power cord | Check power connection, try a different outlet. Ensure power cord is not damaged. |
| Niedokładne odczyty wagi | Unstable surface, calibration needed, debris under platter | Place scale on a level surface. Remove any obstructions. If issue persists, contact service for calibration. |
| Etykiety nie drukują się | No label paper, paper jammed, printhead issue | Check label roll and ensure it's correctly installed. Clear any paper jams. If printhead is faulty, contact service. |
| Wyświetlacz nie działa | Loose connection, internal fault | Ensure display pole is securely connected. Power cycle the unit. If problem continues, contact service. |
Specyfikacje
- Model: QUANTM1-1
- Marka: Hobart
- Typ wyświetlacza: LCD (5.7" graphics display)
- Limit wagowy: 30 funtów
- Weight Capacity Maximum: 30 funtów
- Dokładność odczytu: 0.2 funta
- Platter Width: 14 cali
- Platter Depth: 15 cali
- Pamięć: 2.5 MB pamięci RAM
- Łączność: Wireless capabilities, TCP/IP (Ethernet), RS232 interface
- Obsługa kodów kreskowych: UPC-A, EAN13, EAN128, GS1
- Flashkeys: 32
- Zatwierdzenia: NSF approved, UL listed
- Tomtage: 120 V
- Waga przedmiotu: 44 funtów
Gwarancja i wsparcie
For warranty information, technical support, or service inquiries, please contact Hobart customer service. Retain your proof of purchase for warranty claims. Detailed contact information can typically be found on the manufacturer's webstronie internetowej lub w dokumentacji dołączonej do produktu.