
Wstęp
This manual provides comprehensive instructions for the proper use, setup, and maintenance of your Leica Pinmaster II Metric/Yard Version 40533 rangefinder. Please read this manual thoroughly before operating the device to ensure optimal performance and safety.
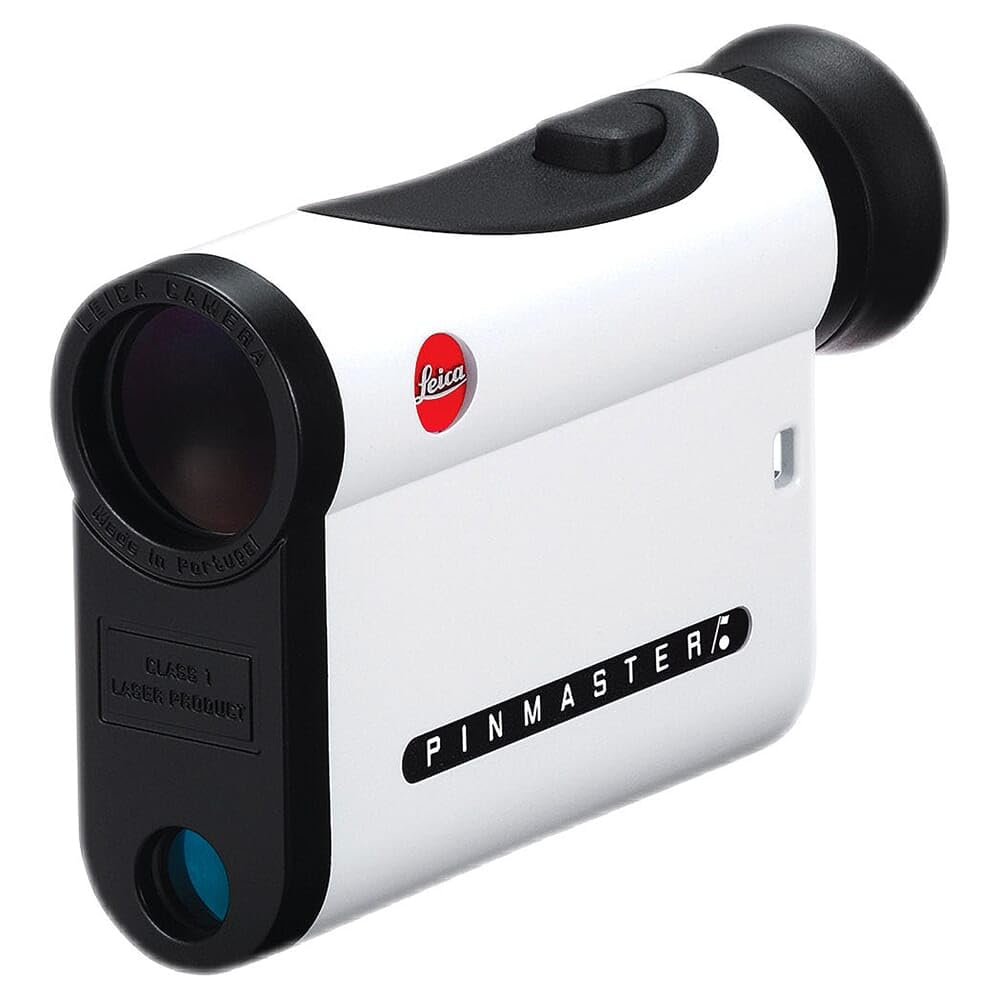
Image: The Leica Pinmaster II rangefinder, a compact device designed for precise distance measurement in golf.
Informacje dotyczące bezpieczeństwa
- Bezpieczeństwo lasera: The Leica Pinmaster II uses an invisible Class 1 laser. Do not look directly into the laser beam or point it at others.
- Bezpieczeństwo baterii: Use only the specified Lithium-Ion battery. Do not attempt to open, crush, or expose the battery to extreme temperatures. Dispose of batteries according to local regulations.
- Ogólna obsługa: Avoid dropping the device or subjecting it to severe impacts. Keep the device away from direct sunlight for prolonged periods.
- Wodoodporność: The device is waterproof to 3 feet. Do not submerge it beyond this depth or for extended periods. Ensure the battery compartment is securely closed before exposure to water.
Zawartość opakowania
Sprawdź, czy w opakowaniu znajdują się wszystkie elementy:
- Leica Pinmaster II Rangefinder (Model 40533)
- Akumulator litowo-jonowy (wstępnie zainstalowany lub osobno)
- Etui transportowe
- Pasek na szyję
- Ściereczka do czyszczenia soczewek
- Szybki przewodnik
Organizować coś
Instalacja baterii
The Leica Pinmaster II operates on a single Lithium-Ion battery. If the battery is not pre-installed, follow these steps:
- Znajdź pokrywę komory baterii, zazwyczaj z boku lub na spodzie urządzenia.
- Turn the cover counter-clockwise to open it.
- Insert the Lithium-Ion battery with the positive (+) terminal facing the direction indicated inside the compartment.
- Replace the cover and turn it clockwise until it is securely tightened to ensure water resistance.
Notatka: A low battery indicator will appear in the display when the battery needs replacement.
Pierwsze włączenie zasilania
After installing the battery, press the main operating button (usually located on the top of the device) to power on the Pinmaster II. The display will illuminate, showing the reticle and measurement units.
Instrukcja obsługi
Włączanie i wyłączanie
- Włączanie: Press the main operating button briefly. The device will power on and the display will activate.
- Automatyczne wyłączanie: The Pinmaster II will automatically power off after approximately 10-15 seconds of inactivity to conserve battery life.
Pomiar odległości
To obtain a single distance measurement:
- Look through the eyepiece and aim the reticle (crosshairs or aiming circle) at the desired target.
- Press and release the main operating button. The distance to the target will be displayed instantly in yards or meters.
- Ensure a steady hand for accurate readings. For small targets like flagsticks, aim carefully.
Opis: The Pinmaster II features a bright, clear display with a precise aiming reticle, allowing users to target objects up to 825 yards away. The 7x magnification aids in target acquisition.
Tryb skanowania
Scan mode allows for continuous measurement of multiple targets or a moving target:
- Press and hold the main operating button for approximately 2 seconds.
- While holding the button, pan the device across different targets. The display will continuously update with the distances to the objects in the reticle's path.
- Release the button to stop scanning. The last measured distance will remain displayed for a few seconds before automatic shut-off.
Unit Selection (Metric/Yard)
To switch between yards and meters:
- With the device powered on, press and hold the main operating button and a secondary function button (if available, refer to the quick start guide for exact button location) simultaneously for a few seconds.
- The unit of measurement (Y or M) in the display will change. Release the buttons when the desired unit is shown.
Regulacja jasności wyświetlacza
The Pinmaster II features an adjustable display brightness for optimal visibility in various lighting conditions. To adjust:
- Włącz urządzenie.
- Press the secondary function button (if available) repeatedly to cycle through different brightness levels.
- Select the brightness level that provides the clearest view without causing glare.
Konserwacja
Czyszczenie optyki
To maintain clear vision, keep the objective and eyepiece lenses clean:
- Do czyszczenia soczewek należy używać dołączonej ściereczki lub miękkiej, niepozostawiającej włókien ściereczki.
- Delikatnie przetrzyj powierzchnię soczewki, aby usunąć kurz i smugi.
- For stubborn dirt, use a small amount of optical lens cleaning fluid applied to the cloth, not directly to the lens.
- Unikaj stosowania materiałów ściernych i silnych środków chemicznych, ponieważ mogą one uszkodzić powłoki soczewek.
Składowanie
When not in use, store the Leica Pinmaster II in its protective carrying case in a cool, dry place. Avoid extreme temperatures and high humidity.
Wymiana baterii
When the low battery indicator appears, replace the Lithium-Ion battery promptly to ensure continued operation. Follow the battery installation steps outlined in the 'Setup' section.
Rozwiązywanie problemów
| Problem | Możliwa przyczyna | Rozwiązanie |
|---|---|---|
| Urządzenie nie włącza się. | Rozładowana lub nieprawidłowo włożona bateria. | Sprawdź położenie baterii. W razie potrzeby wymień baterię. |
| Niedokładne odczyty odległości. | Unsteady hand, obstructed laser path, or target too far/close. | Ensure a steady aim. Clear any obstructions. Verify target is within the 5-825 yard range. |
| Wyświetlacz jest słaby lub nieczytelny. | Niski poziom naładowania baterii lub nieprawidłowe ustawienie jasności. | Replace battery. Adjust display brightness using the function button. |
| Fogging on lenses. | Rapid temperature change or high humidity. | Allow the device to acclimate to the ambient temperature. Wipe lenses with a dry, lint-free cloth. |
Specyfikacje
| Funkcja | Szczegół |
|---|---|
| Numer modelu | 40533 |
| Powiększenie | 7x |
| Zakres pomiarowy | 5-825 jardów (5-750 metrów) |
| Dokładność | ±1 yard up to 400 yards, ±2 yards up to 800 yards, ±0.5% beyond 800 yards (typical) |
| Typ baterii | Litowo-jonowy |
| Odporność na wodę | Wodoodporny do 3 stóp |
| Tworzywo | Carbon fiber housing |
| Wymiary (dł. x szer. x wys.) | 2.95" dł. x 4.44" szer. x 1.07" wys. (75 x 113 x 27 mm) |
| Waga | 8 uncji (227 grama) |
Gwarancja i wsparcie
Leica products are manufactured to the highest quality standards and come with a limited warranty. For detailed warranty information, product registration, or technical support, please refer to the official Leica website or contact Leica customer service. Keep your purchase receipt as proof of purchase for warranty claims.
Zasoby internetowe: For additional information, FAQs, and software updates, visit the official Sklep Leica na Amazonie or the main Leica webstrona.