
1. Wprowadzenie
This manual provides detailed instructions for the installation, operation, and maintenance of the Supermicro CSE-827HD-R1400B 1400W 2U Rackmount Server Chassis. This high-performance chassis is designed to house server components, offering robust power delivery and efficient cooling for demanding applications. Please read this manual thoroughly before proceeding with installation or operation.
2. Informacje dotyczące bezpieczeństwa
Aby zapobiec obrażeniom ciała i uszkodzeniom sprzętu, należy zawsze przestrzegać następujących środków ostrożności:
- Przed przystąpieniem do prac instalacyjnych lub konserwacyjnych należy upewnić się, że zasilanie jest odłączone.
- Wear anti-static wrist straps when handling internal components to prevent electrostatic discharge (ESD).
- Do not operate the chassis with the cover removed unless specifically instructed for troubleshooting.
- Upewnij się, że wszystkie połączenia elektryczne są prawidłowo uziemione.
- This chassis is heavy. Use appropriate lifting techniques or assistance when moving or installing it in a rack.
- Maintain adequate ventilation around the chassis to prevent overheating.
3. Zawartość opakowania
Sprawdź, czy w opakowaniu znajdują się wszystkie elementy:
- Supermicro CSE-827HD-R1400B 2U Rackmount Server Chassis
- 1400W High-Efficiency (1+1) Redundant Power Supply (pre-installed)
- 4x 80mm PWM Cooling Fans (pre-installed)
- Rack mounting rails (if included with your specific purchase)
- Accessory kit (screws, cables, standoffs)
- Krótki przewodnik instalacji (ten dokument)
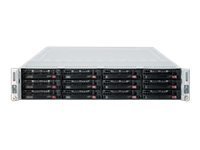
Rysunek 3.1: Supermicro CSE-827HD-R1400B 2U Rackmount Server Chassis. This image shows the front view of the server chassis, highlighting its rackmount design and general appearance.
4. Konfiguracja i instalacja
Follow these steps for proper installation of the server chassis and its components.
4.1. Montaż w stojaku
- Attach the provided rack rails to the server chassis sides using the designated screws.
- Mount the other end of the rack rails to the server rack posts, ensuring they are securely fastened.
- Slide the chassis into the rack until it locks into place.
4.2. Instalacja płyty głównej
The chassis supports ATX motherboards.
- Remove the chassis top cover by unscrewing the retaining screws.
- Install the I/O shield into the chassis rear panel.
- Align the motherboard with the standoffs inside the chassis.
- Przymocuj płytę główną odpowiednimi śrubami.
4.3. Instalacja dysku twardego
The chassis supports 3.5-inch hard drives.
- Locate the drive bays.
- Mount each 3.5-inch hard drive into a drive tray.
- Slide the drive tray with the installed hard drive into the designated bay until it clicks into place.
- Connect the SATA/SAS data and power cables to each hard drive.
4.4. Połączenia zasilania
- Connect the main 24-pin ATX power connector from the power supply to the motherboard.
- Podłącz 8-pinowe (lub 4-pinowe) złącze zasilania procesora do płyty głównej.
- Ensure all peripheral power connectors (e.g., for GPUs, additional fans) are properly connected.
- Connect the AC power cords from the redundant power supplies to separate, grounded power outlets.
5. Instrukcja obsługi
5.1. Włączanie/wyłączanie zasilania
- Włączanie: After all connections are secure, press the power button on the front panel. The power LED should illuminate.
- Normalne wyłączenie: Perform a graceful shutdown through the operating system.
- Wymusić zamknięcie: Press and hold the power button for 5-7 seconds. Use only when necessary to prevent data loss.
5.2. Wskaźniki LED
Refer to your motherboard manual for specific LED indicator meanings. Common indicators on the chassis front panel include:
- Dioda LED zasilania: Indicates system power status (On/Off/Standby).
- HDD Activity LED: Flashes when hard drives are being accessed.
- Network Activity LED: Indicates network traffic (if integrated on the front panel).
6. Konserwacja
Regular maintenance ensures optimal performance and longevity of your server chassis.
- Usuwanie kurzu: Periodically clean dust from the chassis interior, especially fan blades and heatsinks, using compressed air. Ensure the system is powered off and unplugged before cleaning.
- Kontrola wentylatora: Check cooling fans for proper operation and excessive noise. Replace any failing fans promptly.
- Zarządzanie kablami: Ensure internal cables are neatly routed to avoid obstructing airflow.
7. Rozwiązywanie Problemów
W tej sekcji omówiono typowe problemy, na które możesz natrafić.
| Problem | Możliwa przyczyna | Rozwiązanie |
|---|---|---|
| System nie włącza się. | Power cables disconnected, faulty power supply, faulty power button. | Check all power connections. Verify power supply status LEDs. Test power button functionality. |
| Excessive fan noise. | Dust accumulation, failing fan bearing. | Clean fans. Replace noisy or failing fans. |
| Przegrzanie systemu. | Poor airflow, fan failure, dust buildup. | Ensure proper ventilation. Check fan operation. Clean dust from components. |
| Hard drives not detected. | Loose data/power cables, incorrect BIOS settings, faulty drive. | Verify all data and power cables are securely connected. Check BIOS/UEFI settings. Test drives in another system if possible. |
8. Specyfikacje
| Funkcja | Szczegół |
|---|---|
| Marka | Supermikro |
| Nazwa modelu | CSE-827HD-R1400B |
| Współczynnik kształtu | Montaż w szafie 2U |
| Zgodność płyty głównej | ATX |
| Zasilacz | 1400W High-Efficiency (1+1) Redundant, 80 PLUS Gold Certified |
| Wentylatory chłodzące | 4x 80mm PWM |
| Współczynnik kształtu dysku twardego | 3.5 cali |
| Kolor | Czarny |
| Waga przedmiotu | 68 funtów |
| Wymiary produktu (Gł. x Szer. x Wys.) | 28.5" gł. x 28.5" szer. x 28.5" wys. |
| UPC | 672042062768 |
| ASIN | B005KFBPBS |
9. Gwarancja i wsparcie
For warranty information, please refer to the documentation provided with your purchase or visit the official Supermicro website. For technical support, product inquiries, or to report issues, please contact Supermicro customer service through their official channels.
Wsparcie online: www.supermicro.com/support
Informacje kontaktowe: Zapoznaj się z Supermikro webstrona zawierająca dane kontaktowe dotyczące regionu.