
1. Wprowadzenie
The InFocus IN1112 Ultra Mobile Widescreen DLP Projector is designed for professionals requiring a portable and high-performance display solution. Its combination of high brightness, lightweight design, and compact size makes it suitable for various environments, from brightly lit rooms to limited spaces. This manual provides essential information for setting up, operating, maintaining, and troubleshooting your projector.
Główne cechy:
- Compact and lightweight (approximately 2.7 lbs / 1.2 kg) for easy portability.
- 2200 lumens of brightness for clear projection in various lighting conditions.
- HDMI input for versatile connectivity with modern devices including laptops, smartphones, and gaming consoles.
- Durable design built for frequent travel.
- Widescreen (WXGA) resolution to match contemporary laptop displays.
2. Informacje dotyczące bezpieczeństwa
Przed przystąpieniem do użytkowania projektora należy przeczytać wszystkie instrukcje bezpieczeństwa, aby zapobiec obrażeniom ciała lub uszkodzeniu urządzenia.
- Do not look directly into the projector lens kiedy lamp jest włączony. Intensywne światło może uszkodzić wzrok.
- Ensure proper ventilation. Do not block ventilation openings, as this can lead to overheating and damage.
- Ustaw projektor na stabilnej i równej powierzchni, aby zapobiec jego upadkowi.
- Używaj wyłącznie przewodu zasilającego dołączonego do projektora.
- Do not expose the projector to rain, moisture, or excessive humidity.
- Wszelkie czynności serwisowe należy zlecać wykwalifikowanemu personelowi. Nie należy podejmować prób samodzielnego otwierania ani naprawy projektora.
- Trzymaj projektor z dala od źródeł ciepła i bezpośredniego światła słonecznego.
3. Zawartość opakowania
Sprawdź, czy w opakowaniu znajdują się wszystkie elementy:
- Projektor InFocus IN1112
- Kabel zasilający
- Pilot (z bateriami)
- Kabel VGA
- Kabel HDMI
- Instrukcja obsługi (ten dokument)
- Carrying Case (may vary by region)
4. Koniec produktuview
Familiarize yourself with the main components of your InFocus IN1112 projector.
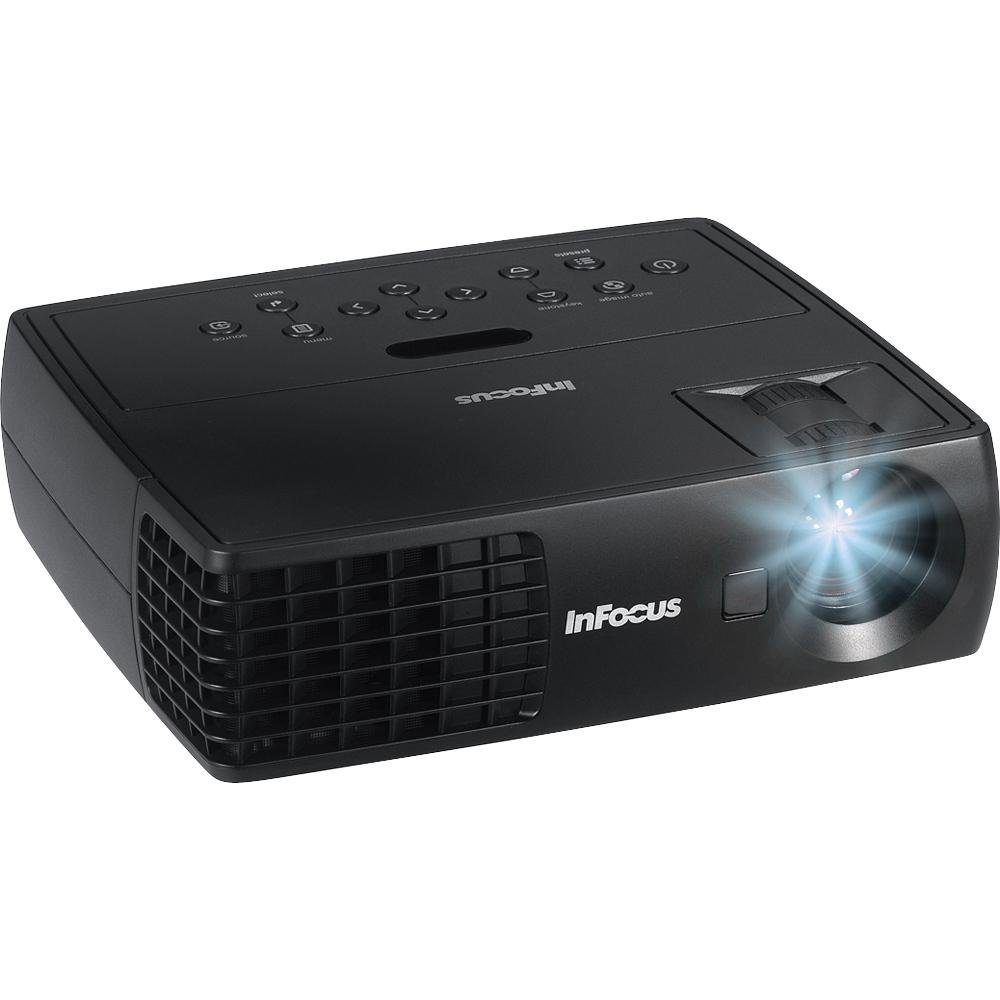
Rycina 4.1: Przód view of the InFocus IN1112 Projector. This image displays the projector's lens, ventilation, and part of the control panel.

Rysunek 4.2: Strona view of an InFocus projector, illustrating typical connectivity ports such as HDMI and VGA.
4.1. Panel przedni
- Soczewka projekcyjna: Wyświetla obraz na ekranie.
- Pierścień ostrości: Adjusts the sharpness of the projected image.
- Dźwignia zoomu: Dostosowuje rozmiar wyświetlanego obrazu.
4.2. Top Panel (Control Panel)
- Przycisk zasilania: Włącza lub wyłącza projektor.
- Przycisk menu: Dostęp do menu ekranowego (OSD).
- Przyciski nawigacyjne (góra/dół/lewo/prawo): Umożliwia nawigację po opcjach menu.
- Przycisk Enter: Potwierdza wybór w menu.
- Przycisk źródła: Selects the input source (HDMI, VGA, USB).
4.3. Rear Panel (Connectivity)
- Port HDMI: Connects to devices with HDMI output (laptops, media players).
- Port VGA: Łączy się z komputerami wyposażonymi w wyjście VGA.
- Port USB: Do celów serwisowych i podłączania zgodnych urządzeń USB.
- Pobór mocy: Łączy kabel zasilający.
5. Konfiguracja
5.1. Umieszczenie
- Umieść projektor na płaskiej, stabilnej powierzchni.
- Ensure there is adequate space around the projector for ventilation (at least 30 cm / 12 inches).
- Position the projector at an appropriate distance from the screen to achieve the desired image size.
5.2. Podłączenie zasilania
- Podłącz kabel zasilający do portu wejściowego zasilania projektora.
- Podłącz drugi koniec kabla zasilającego do uziemionego gniazdka elektrycznego.
5.3. Connecting a Source Device
Choose the appropriate cable for your source device:
- HDMI: Connect one end of the HDMI cable to the projector's HDMI port and the other end to your laptop, media player, or other HDMI-enabled device.
- VGA: Connect one end of the VGA cable to the projector's VGA port and the other end to your computer's VGA output. Secure the screws on the VGA connector if available.
6. Obsługa
6.1. Włączanie/wyłączanie zasilania
- Włączanie: Naciśnij przycisk zasilania na panelu sterowania projektora lub pilocie. Kontrolka zasilania zaświeci się ciągłym niebieskim światłem.
- Aby wyłączyć: Press the Power button again. A confirmation message may appear. Press Power again to confirm shutdown. The projector will enter a cooling cycle, and the power indicator will flash before turning off.
6.2. Wybór źródła sygnału wejściowego
Naciśnij Źródło button on the projector or remote control repeatedly to cycle through available input sources (e.g., HDMI, VGA). The projector will automatically detect an active signal if connected.
6.3. Regulacja obrazu
- Centrum: Obróć pierścień ostrości na obiektywie, aż obraz stanie się ostry i wyraźny.
- Brzęczenie: Use the zoom lever on the lens to adjust the size of the projected image.
- Korekcja Keystone'a: If the image appears trapezoidal, use the Keystone Correction function in the OSD menu to square the image.
6.4. Using the On-Screen Display (OSD) Menu
- Naciśnij Menu button on the projector or remote control to open the OSD menu.
- Użyj Nawigacja buttons (Up/Down/Left/Right) to move through menu options.
- Naciśnij Wchodzić przycisk umożliwiający wybór opcji lub potwierdzenie ustawienia.
- Użyj Nawigacja przyciski umożliwiające dostosowanie wartości lub wybór podopcji.
- Naciśnij Menu button again to exit the OSD menu.
Common OSD settings include Brightness, Contrast, Color Temperature, Aspect Ratio, and Advanced Settings.
7. Konserwacja
7.1. Czyszczenie projektora
- Casing: Użyj miękkiej, niestrzępiącej się ściereczki, lekko wyczyśćampened with water or a mild cleaner. Do not use abrasive cleaners or solvents.
- Obiektyw: Use a professional lens cleaning cloth and lens cleaning solution. Gently wipe the lens in a circular motion. Avoid touching the lens with your fingers.
- Otwory wentylacyjne: Periodically clean the ventilation openings with a soft brush or compressed air to prevent dust buildup.
7.2.Pamp Pielęgnacja
Projektor lamp has an operating life of approximately 5000 hours. When the lamp reaches the end of its life, the image brightness may decrease, or the lamp indicator may illuminate. Refer to the full service manual for lamp replacement procedures, which should be performed by qualified personnel.
8. Rozwiązywanie Problemów
W tej sekcji omówiono typowe problemy, które mogą wystąpić podczas korzystania z projektora.
| Problem | Możliwa przyczyna | Rozwiązanie |
|---|---|---|
| Brak wyświetlanego obrazu | Power cable loose; Source not selected; Input device off; Lamp wydanie. | Check power connection; Select correct input source; Ensure input device is on; Contact support if lamp indicator is active. |
| Obraz jest rozmazany | Obiektyw nie jest ostry; Projektor znajduje się zbyt blisko/daleko od ekranu. | Adjust the focus ring on the lens; Adjust projector distance or zoom. |
| Obraz ma kształt trapezu | Projektor nie jest ustawiony prostopadle do ekranu. | Use Keystone Correction in the OSD menu; Reposition the projector. |
| Pilot nie działa | Batteries dead; Obstruction between remote and projector; Remote sensor blocked. | Replace batteries; Remove obstructions; Ensure remote is pointed at the projector's sensor. |
| Projektor przegrzewa się i wyłącza | Zablokowana wentylacja; Wysoka temperatura otoczenia. | Ensure ventilation openings are clear; Operate in a well-ventilated area. |
9. Specyfikacje
Detailed technical specifications for the InFocus IN1112 Projector.
| Funkcja | Specyfikacja |
|---|---|
| Marka | W centrum uwagi |
| Nazwa modelu | IN1112 Ultra |
| Typ wyświetlacza | DLP |
| Jasność | 2200 lumenów (2100 lumenów ANSI) |
| Rozdzielczość natywna | 1920 x 1080 (Full HD, though WXGA is mentioned in title, 1920x1080 is in specs) |
| Maksymalna rozdzielczość wyświetlacza | 1920x1080 |
| Współczynnik kontrastu | 2600:1 |
| Technologia łączności | HDMI, VGA, USB |
| Żywotność źródła światła | 5000 godziny |
| Waga przedmiotu | 1.2 kg (2.65 funta) |
| Cotage | 185 wata (Lamp Cotage: 165 watts) |
| Kolor | Black (Note: Product images may show white units for illustration) |
| Zalecane zastosowania | Business, Traveling |
| Typ montażu | Uchwyt na blat |
| Metoda kontroli | Remote, Button Control |
10. Gwarancja i wsparcie
10.1. Informacje o gwarancji
The InFocus IN1112 Projector typically comes with a manufacturer's limited warranty. Please refer to the warranty card included with your product or visit the official InFocus webSzczegółowe warunki gwarancji, w tym czas trwania i zakres ochrony, znajdziesz na stronie. Zachowaj dowód zakupu na wypadek roszczeń gwarancyjnych.
10.2. Obsługa klienta
For technical assistance, troubleshooting beyond this manual, or service inquiries, please contact InFocus customer support. You can find contact information, FAQs, and additional resources on the official InFocus webstrona: www.infocus.com