
1. Wprowadzenie
This manual provides detailed instructions for the operation and maintenance of your AudioSonic CL-1486 Alarm Clock Radio. Please read this manual thoroughly before use to ensure proper function and safety. Keep this manual for future reference.
2. Ważne instrukcje bezpieczeństwa
- Przeczytaj wszystkie instrukcje przed uruchomieniem urządzenia.
- Do not expose this appliance to rain or moisture to reduce the risk of fire or electric shock.
- Do not expose the appliance to dripping or splashing. No objects filled with liquids, such as vases, shall be placed on the appliance.
- Nie zasłaniaj żadnych otworów wentylacyjnych. Montaż należy wykonać zgodnie z instrukcją producenta.
- Nie należy instalować w pobliżu źródeł ciepła, takich jak grzejniki, kratki wentylacyjne, piece lub inne urządzenia (w tym amp(lifiers) wytwarzające ciepło.
- Chroń przewód zasilający przed nadepnięciem lub ściśnięciem, szczególnie przy wtyczkach, gniazdkach i miejscach wyjścia z urządzenia.
- Stosować wyłącznie dodatki/akcesoria wskazane przez producenta.
- Odłączaj urządzenie od zasilania podczas burzy z piorunami lub jeśli nie używasz go przez dłuższy czas.
- Wszelkie prace serwisowe należy zlecać wykwalifikowanemu personelowi. Serwis jest konieczny, gdy urządzenie uległo uszkodzeniu w jakikolwiek sposób, np. w wyniku uszkodzenia przewodu zasilającego lub wtyczki, rozlania płynu lub wpadnięcia do urządzenia jakiegoś przedmiotu, narażenia urządzenia na działanie deszczu lub wilgoci, nieprawidłowego działania lub upadku.
3. Koniec produktuview
The AudioSonic CL-1486 is a versatile alarm clock radio with a large display and projection feature. Familiarize yourself with the main components and controls:
3.1 Przód View

Rycina 1: Przód view of the AudioSonic CL-1486, highlighting the 1.8-inch jumbo display.
The front panel features a large, clear 1.8-inch digital display for time, date, and radio frequency. It also shows indicators for alarm status, temperature, and day of the week.
3.2 na górze View - Control Buttons
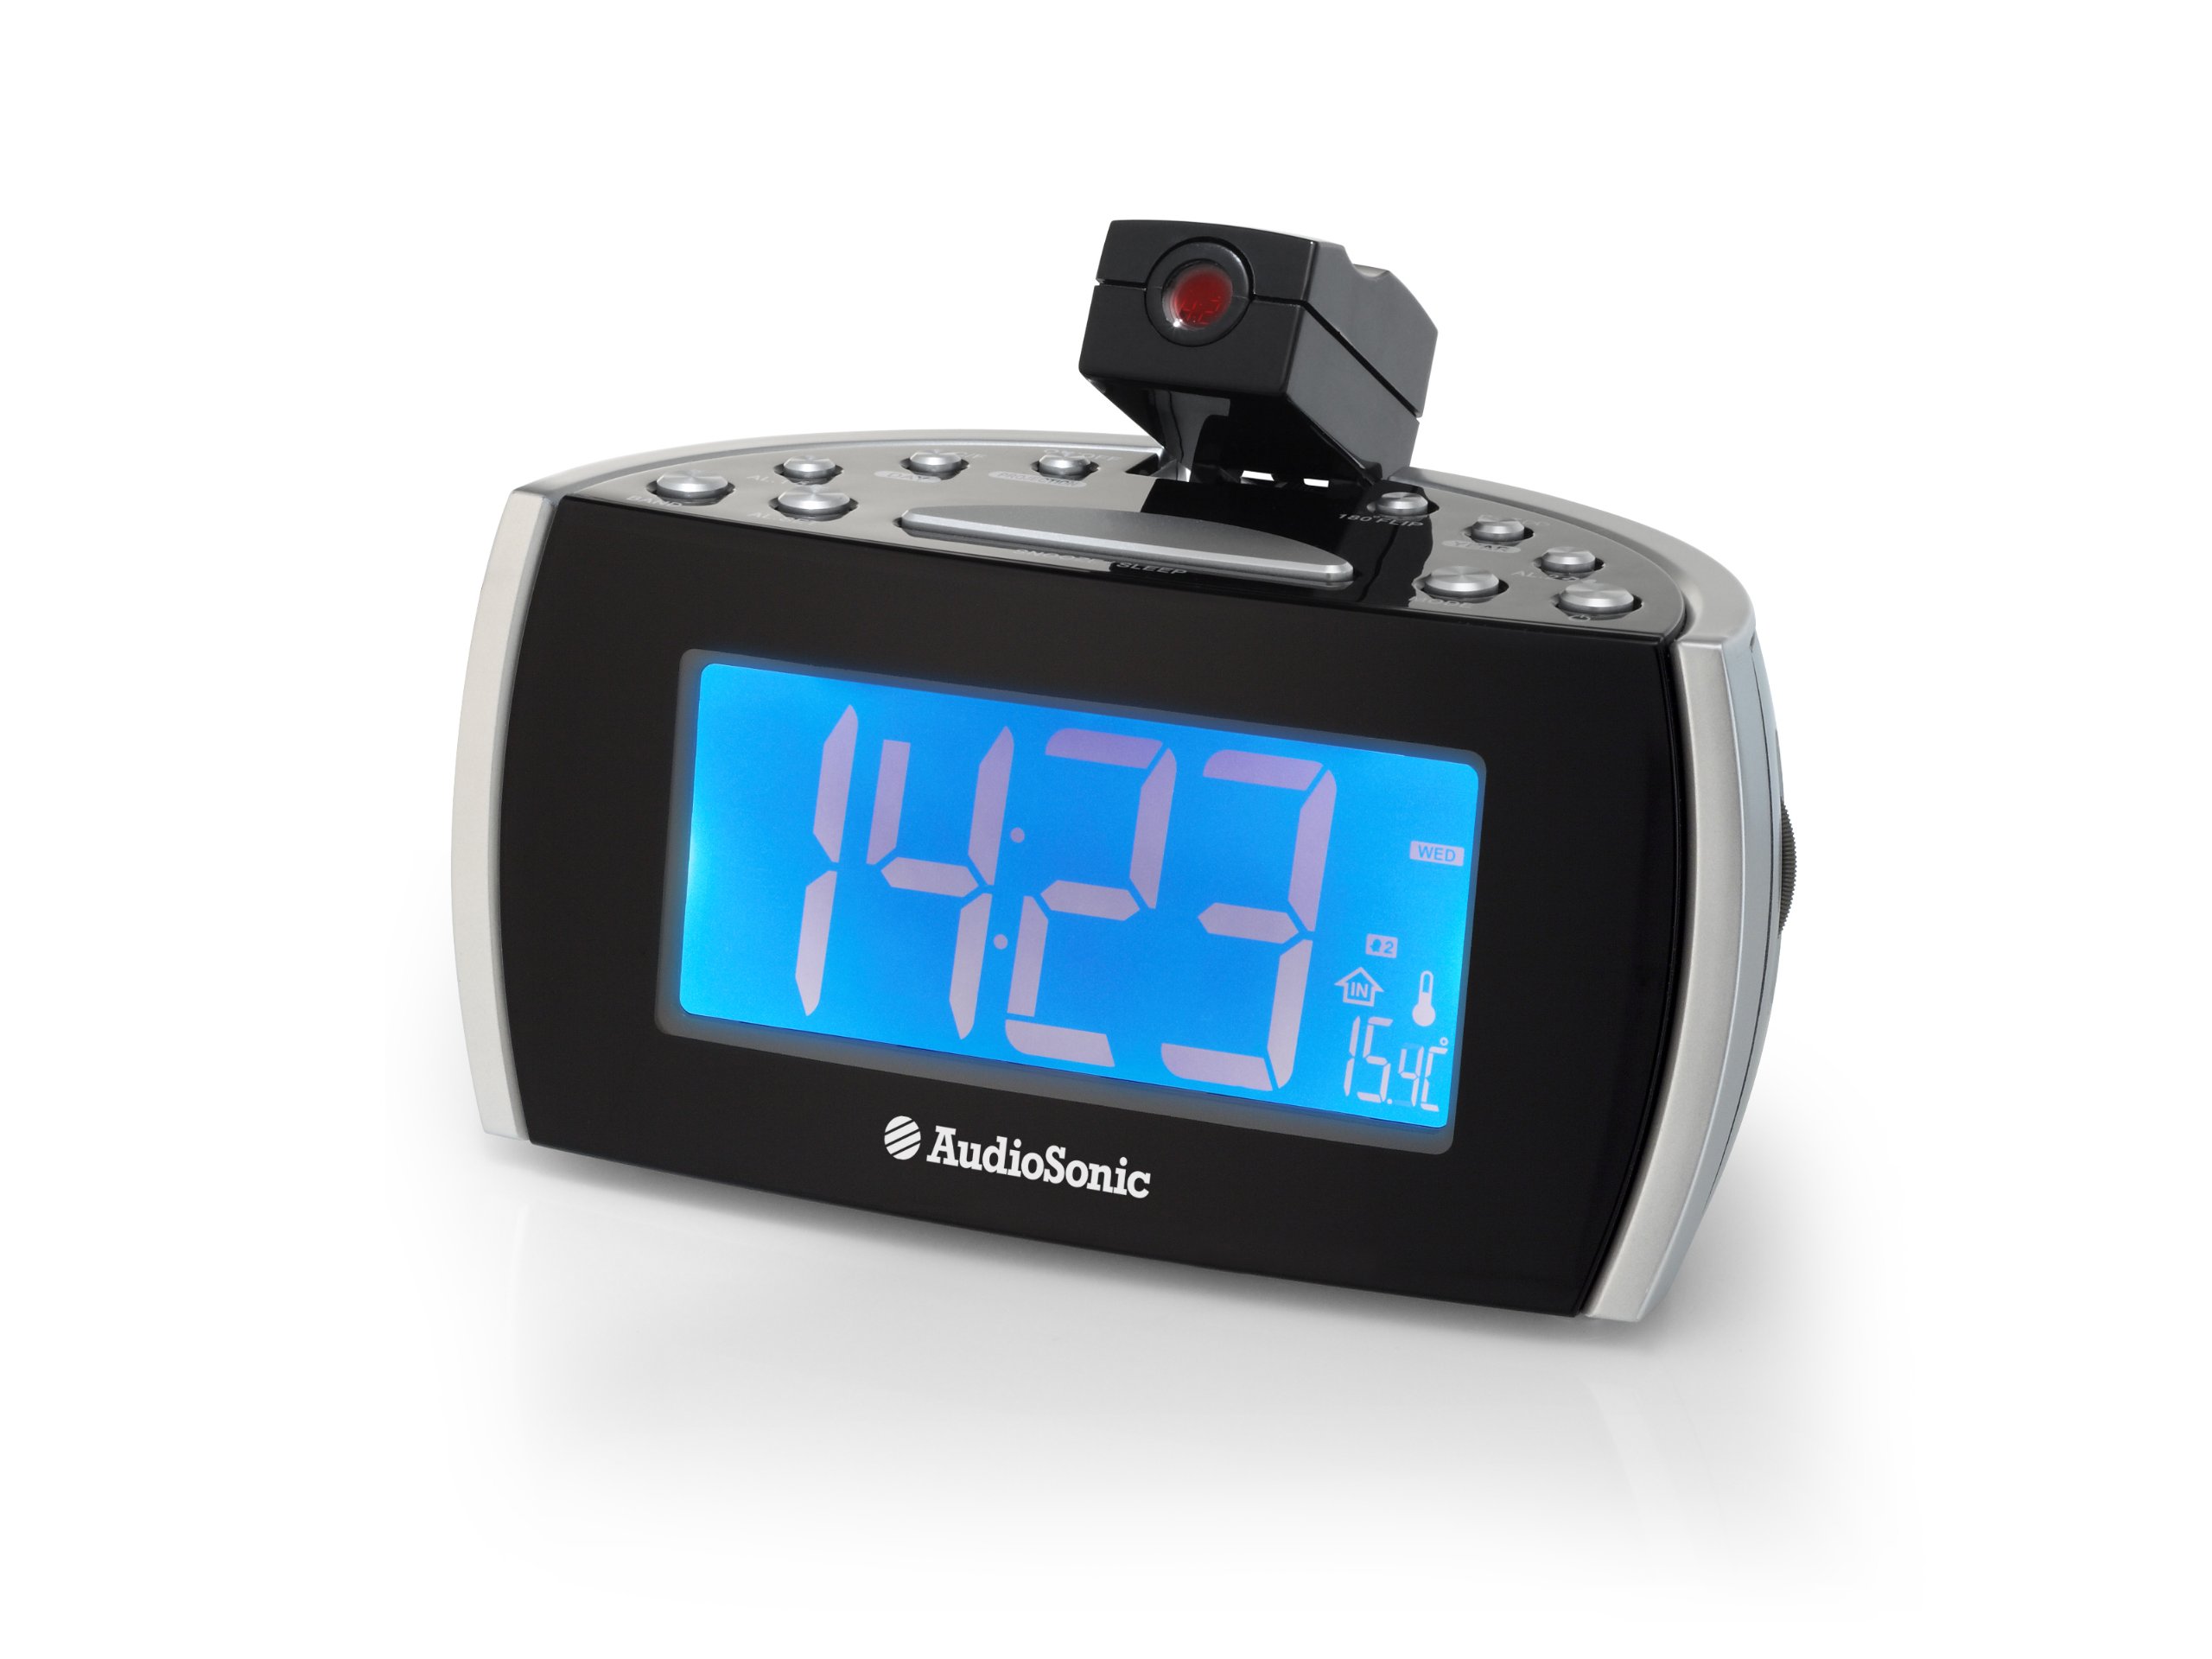
Rysunek 2: Góra view of the control panel and projection unit.
The top panel houses all functional buttons and the adjustable projection lens. Refer to the table below for button functions:
| Przycisk | Funkcjonować |
|---|---|
| WŁ./WYŁ. | Powers the unit on or off (standby). |
| C / F | Przełącza wyświetlanie temperatury między stopniami Celsjusza i Fahrenheita. |
| WYSTĘP | Activates or deactivates the time projection. |
| 180 FLIP | Rotates the projected image by 180 degrees. |
| Czas letni | Adjusts for Daylight Saving Time. |
| ROK | Used for setting the year in time/date setting mode. |
| AL.1 | Activates/deactivates or selects Alarm 1. |
| DZIEŃ | Used for setting the day in time/date setting mode. |
| AL.2 | Activates/deactivates or selects Alarm 2. |
| ZESPÓŁ | Selects between FM and MW (AM) radio bands. |
| AL.ZESTAW | Enters alarm setting mode or confirms settings. |
| DRZEMKA/SEN | Press for snooze function; hold for sleep timer. |
| TRYB | Cycles through display modes (time, date, temperature) or enters setting modes. |
3.3 Funkcja projekcji

Figure 3: Time projection in action.
The integrated projector allows you to display the time onto a wall or ceiling. The projection angle can be adjusted manually, and the 180 FLIP button allows for orientation correction.
4. Konfiguracja
4.1 Połączenie zasilania
- Uncoil the FM antenna wire completely for optimal radio reception.
- Podłącz zasilacz sieciowy do standardowego gniazdka ściennego.
- Urządzenie włączy się, a wyświetlacz zostanie podświetlony.
4.2 Ustawienie czasu początkowego
- Naciśnij i przytrzymaj TRYB Naciskaj przycisk, aż wyświetlacz czasu zacznie migać.
- Użyj ROK I DZIEŃ Przyciski do ustawienia godziny i minuty. Naciśnij TRYB to cycle between setting hours, minutes, year, and day.
- Naciskać TRYB again to confirm the settings and exit time setting mode.
5. Instrukcja obsługi
5.1 Setting the Alarm (AL.1 / AL.2)
The CL-1486 features two independent alarms with a weekend mode function.
- Naciśnij AL.ZESTAW button once to enter Alarm 1 setting mode. The AL.1 indicator will flash.
- Użyj ROK I DZIEŃ przyciski umożliwiające ustawienie żądanej godziny alarmu (godziny i minuty).
- Naciskać AL.ZESTAW again to select the alarm source (Buzzer or Radio). Use ROK or DZIEŃ wybierać.
- Naciskać AL.ZESTAW a third time to set the weekend mode (on/off). When active, the alarm will not sound on Saturdays and Sundays.
- Naciskać AL.ZESTAW a fourth time to confirm Alarm 1 settings.
- Powtórz kroki 1-5 dla Alarmu 2, naciskając AL.ZESTAW twice initially to enter Alarm 2 setting mode.
- Aby aktywować lub dezaktywować alarm, naciśnij odpowiedni przycisk AL.1 or AL.2 button. The alarm indicator will appear/disappear on the display.
5.2 Działanie radiowe
- Naciśnij WŁ./WYŁ. przycisk, aby włączyć radio.
- Naciśnij ZESPÓŁ przycisk umożliwiający przełączanie między pasmami FM i MW (AM).
- To tune to a station, press and hold the ROK or DZIEŃ button for automatic scanning to the next available station. For manual tuning, short press the ROK or DZIEŃ przycisk.
- Adjust the volume using the volume control knob, typically located on the side of the unit.
- Aby wyłączyć radio, naciśnij WŁ./WYŁ. przycisk.
5.3 Projekcja czasu
- Naciśnij WYSTĘP przycisk umożliwiający włączenie lub wyłączenie projekcji czasu.
- Adjust the angle of the projection lens manually to direct the time onto a wall or ceiling.
- If the projected image is upside down, press the 180 FLIP button to rotate it.
- To adjust the clarity of the projected image, rotate the focus ring around the projection lens (if available).
5.4 Funkcje drzemki i snu
- Drzemka: Gdy zabrzmi alarm, naciśnij duży przycisk DRZEMKA/SEN bar to temporarily silence the alarm. The alarm will sound again after a few minutes (default snooze time).
- Wyłącznik czasowy: Podczas odtwarzania radia naciśnij i przytrzymaj przycisk DRZEMKA/SEN bar to activate the sleep timer. Repeated presses will cycle through available sleep times (e.g., 90, 60, 30, 15 minutes, OFF). The radio will automatically turn off after the selected duration.
6. Konserwacja
To ensure the longevity and proper functioning of your AudioSonic CL-1486, follow these simple maintenance guidelines:
- Czyszczenie: Wipe the unit with a soft, dry cloth. Do not use abrasive cleaners, waxes, or solvents as they may damage the cabinet.
- Pył: Keep the unit free from dust, especially the projection lens, to maintain clear projection.
- Środowisko: Unikać umieszczania urządzenia w miejscu bezpośrednio nasłonecznionym, w pobliżu źródeł ciepła lub w miejscach o dużej wilgotności.
7. Rozwiązywanie Problemów
| Problem | Możliwa przyczyna | Rozwiązanie |
|---|---|---|
| Brak zasilania / Wyświetlacz wyłączony | Przewód zasilający nie jest prawidłowo podłączony. | Ensure the AC power adapter is securely plugged into the unit and a working wall outlet. |
| Alarm nie włącza się | Alarm nie jest aktywowany lub jest nieprawidłowo ustawiony. | Check that the AL.1 or AL.2 indicator is visible on the display. Verify alarm time and source settings. Ensure volume is not set to minimum if radio alarm is selected. |
| Słaby odbiór radia | Antena nie jest wysunięta lub urządzenie znajduje się w obszarze o słabym odbiorze. | Fully extend the FM antenna wire. Reposition the unit for better reception. |
| Projection is unclear or distorted | Projection lens is out of focus or dirty. | Adjust the focus ring around the projection lens. Clean the lens with a soft, dry cloth. Ensure the projection surface is flat and clear. |
| Nieprawidłowa godzina/data | Time/Date not set or power interruption. | Reset the time and date following the instructions in section 4.2. |
8. Specyfikacje
- Numer modelu: Kl-1486
- Marka: AudioSonic
- Typ wyświetlacza: Cyfrowy
- Rozmiar wyświetlacza: 1.8 cali
- Kolor: Czarny
- Źródło zasilania: Elektryczny przewodowy
- Wymiary produktu: Wymiary 18.5 x 9.5 x 9 cm
- Waga: 630 gramów
- Cechy szczególne: Projection, Two Alarm Times, Weekend Mode, Digital Frequency Display
- Typ montażu: Blat stołu
- Zastosowanie wewnątrz / na zewnątrz: Wnętrz
9. Gwarancja i wsparcie
Aby uzyskać informacje o gwarancji i obsłudze klienta, zapoznaj się z dokumentacją dołączoną do produktu lub skontaktuj się ze sprzedawcą. Zachowaj dowód zakupu na wypadek roszczeń gwarancyjnych.


