1. Wprowadzenie
This manual provides essential information for the safe and efficient operation, installation, and maintenance of your Steinbach SPS 100-1 self-priming filter pump. Please read all instructions carefully before installation and use. Keep this manual for future reference.
2. Instrukcje bezpieczeństwa
Ważne informacje dotyczące bezpieczeństwa:
- Przed przystąpieniem do czynności konserwacyjnych lub czyszczenia należy zawsze odłączyć pompę od zasilania.
- Ensure the electrical installation complies with local regulations and is protected by a Residual Current Device (RCD) with a tripping current not exceeding 30 mA.
- Do not operate the pump if the power cord or plug is damaged. Contact qualified personnel for repairs.
- The pump must be installed on a solid, level surface, protected from direct sunlight and rain.
- Ensure adequate ventilation around the pump motor to prevent overheating.
- Urządzenie to nie jest przeznaczone do użytku przez osoby (w tym dzieci) o ograniczonej sprawności fizycznej, sensorycznej lub umysłowej, a także osoby nieposiadające odpowiedniego doświadczenia lub wiedzy, chyba że znajdują się one pod nadzorem osoby odpowiedzialnej za ich bezpieczeństwo lub otrzymały od niej instrukcje dotyczące korzystania z urządzenia.
- Dzieci powinny znajdować się pod nadzorem, aby mieć pewność, że nie bawią się urządzeniem.
3. Koniec produktuview
The Steinbach SPS 100-1 is a self-priming filter pump designed for efficient water circulation in swimming pool filter systems, such as the Speed Clean Comfort 75. It operates without a built-in timer, offering continuous operation when powered.
Komponenty
- Pump body with motor
- Pre-filter basket with transparent lid
- Połączenia wlotowe i wylotowe
- Kabel zasilający z wtyczką

Rysunek 1: Koniecview of the Steinbach SPS 100-1 Self-Priming Filter Pump.
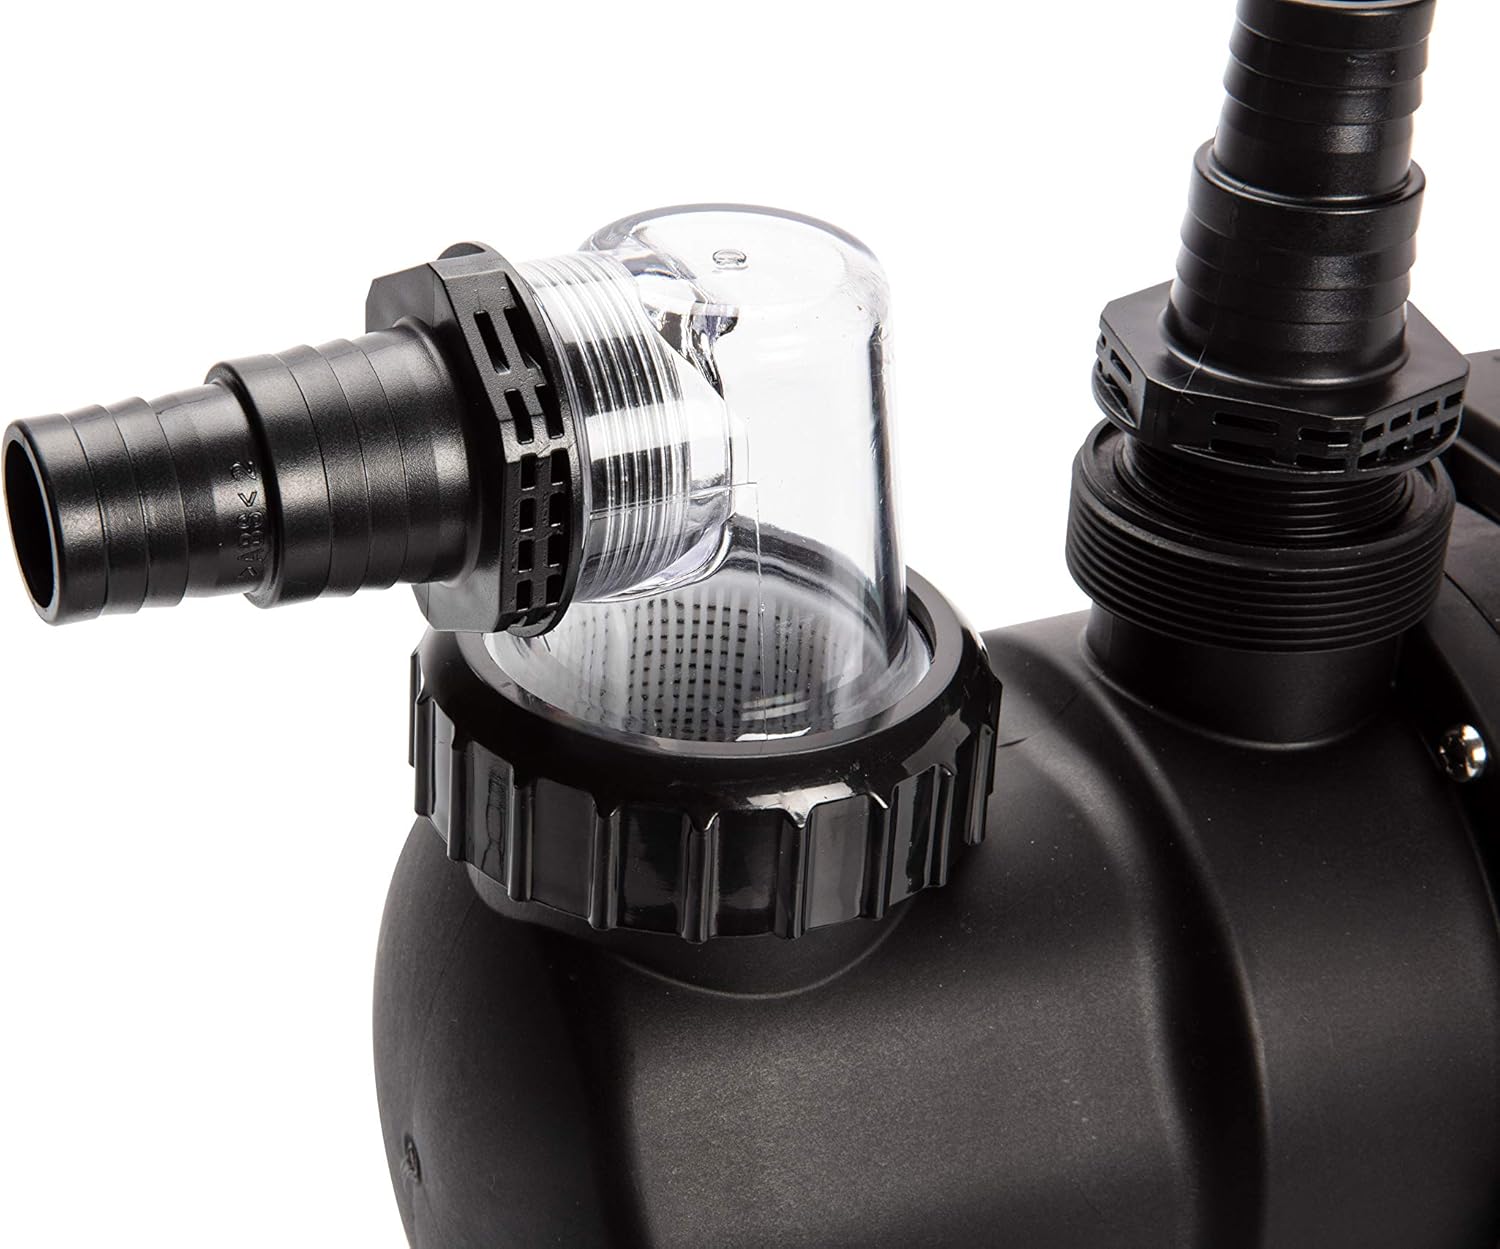
Rysunek 2: Zbliżenie view of the pre-filter housing and the inlet connection with a hose attached. The transparent lid allows for easy inspection of the filter basket.

Rysunek 3: Szczegółowy view of the pre-filter and the threaded inlet connection, ready for hose attachment.

Figure 4: Close-up of the pump's outlet connection with a hose securely fastened, directing filtered water.

Rysunek 5: Szczegółowy view of the pump's threaded outlet connection, showing the port where the return hose connects.

Figure 6: Product label displaying technical specifications such as model number, voltage, power, and flow rate.
4. Konfiguracja i instalacja
Proper installation is crucial for the pump's performance and longevity. Refer to your specific filter system manual for detailed plumbing instructions.
4.1 Umieszczenie
- Position the pump as close to the pool as possible, below water level if feasible, to aid in self-priming.
- Ensure the pump is on a stable, level, and dry surface.
- Chroń pompę przed bezpośrednim działaniem warunków atmosferycznych (deszczem, śniegiem, bezpośrednim działaniem promieni słonecznych).
- Allow sufficient space around the motor for ventilation and maintenance access.
4.2 Połączenia hydrauliczne
- Connect the suction line from the pool skimmer/main drain to the pump's inlet (front connection).
- Connect the discharge line from the pump's outlet (top connection) to the filter system's inlet.
- Use appropriate fittings, clamps, and thread sealant (Teflon tape) to ensure watertight connections.
- Avoid kinks or sharp bends in hoses to maintain optimal flow.
4.3 Podłączenie elektryczne
- Upewnij się, że zasilanie jest zgodne z wydajnością pompytage (230 V).
- Plug the pump into a grounded electrical outlet protected by an RCD.
- Do not use extension cords unless absolutely necessary and ensure they are rated for outdoor use and the pump's power requirements.
5. Instrukcja obsługi
5.1 Zalewanie pompy
As a self-priming pump, the SPS 100-1 can draw water, but initial priming is recommended for faster startup:
- Ensure all valves are open, allowing water to flow from the pool to the pump.
- Zdejmij przezroczystą pokrywę filtra wstępnego.
- Fill the pre-filter housing completely with water.
- Załóż pokrywę z powrotem i upewnij się, że pierścień uszczelniający jest prawidłowo osadzony, co zapobiegnie wyciekaniu powietrza.
- Turn on the pump. It should begin to draw water and expel air. If it does not prime within a few minutes, turn it off, re-check connections, and repeat the priming process.
5.2 Normalna praca
- Once primed, the pump will continuously circulate water through your filter system.
- Monitor the pressure gauge on your filter (if applicable) to determine when backwashing or filter cleaning is needed.
- This model does not include a timer, so you will need to manually switch it on and off or connect it to an external timer (not included).
6. Konserwacja
6.1 Pre-Filter Basket Cleaning
Regularly inspect and clean the pre-filter basket to prevent debris buildup and maintain pump efficiency.
- Turn off the pump and disconnect it from the power supply.
- Zamknij wszystkie niezbędne zawory, aby zapobiec wypływaniu wody z basenu.
- Unscrew the transparent lid of the pre-filter.
- Wyjmij kosz i opróżnij go ze wszystkich nagromadzonych zanieczyszczeń.
- Dokładnie wypłucz koszyk wodą.
- Inspect the O-ring on the lid for damage and ensure it is clean.
- Replace the basket and securely fasten the lid.
6.2 Zimowanie
Before freezing temperatures arrive, properly winterize your pump to prevent damage:
- Odłączyć pompę od zasilania.
- Spuść całą wodę z pompy, wyjmując korek spustowy (zazwyczaj znajdujący się na dole obudowy pompy).
- Disconnect all hoses and pipes.
- Clean the pre-filter basket and housing.
- Przechowywać pompę w miejscu suchym i chronionym przed mrozem.
7. Rozwiązywanie Problemów
| Problem | Możliwa przyczyna | Rozwiązanie |
|---|---|---|
| Pompa nie uruchamia się | No power; tripped breaker/RCD; motor jammed | Check power connection, reset breaker/RCD; contact service if motor is jammed. |
| Pump runs but does not prime/no water flow | Air leak in suction line; pre-filter basket clogged; insufficient water in pre-filter; low pool water level | Check all connections for air leaks; clean pre-filter basket; fill pre-filter with water; ensure adequate pool water level. |
| Zmniejszony przepływ wody | Clogged pre-filter; clogged main filter; partially closed valves; debris in impeller | Clean pre-filter; backwash/clean main filter; open all valves fully; inspect impeller for debris (disconnect power first). |
| Głośny hałas/wibracje | Air in pump; cavitation; loose mounting; worn bearings | Check for air leaks and prime pump; ensure adequate water supply; tighten mounting bolts; contact service for worn bearings. |
8. Specyfikacje
| Funkcja | Specyfikacja |
|---|---|
| Numer modelu | 040922 |
| Typ | Self-Priming Filter Pump |
| Tomtage | 230 V |
| Moc | 550 W |
| Maksymalna szybkość przepływu | 158 Liters Per Minute (9.400 l/h) |
| Maksymalna wysokość głowy | 10 metrów |
| Tworzywo | Stainless Steel (motor components), Durable Plastic (pump housing) |
| Waga | 5.96 kilogramów |
| Kolor | Czarny |
| Cechy | Self-priming, No integrated timer, Suitable for Speed Clean Comfort 75 sand filter systems |
9. Gwarancja i wsparcie
For warranty information and technical support, please refer to the documentation provided with your purchase or contact Steinbach customer service directly. Keep your proof of purchase for warranty claims.
Informacje kontaktowe:
- Manufacturer: Steinbach
- Webstrona: www.steinbach.at (Please check for local support details)