Wstęp
The MSD 8762 Boost Timing Master is an advanced electronic device designed to provide precise timing control for turbocharged or supercharged engines. It allows for accurate boost-dependent timing retard, protecting your engine from detonation under boost conditions and optimizing performance. This manual provides essential information for the proper installation, operation, and maintenance of your Boost Timing Master.
Informacje dotyczące bezpieczeństwa
Always observe the following safety precautions to prevent personal injury or damage to the product or vehicle:
- Przed przystąpieniem do prac elektrycznych należy odłączyć akumulator pojazdu.
- Aby zapobiec zwarciom, należy upewnić się, że wszystkie połączenia przewodów są solidne i właściwie zaizolowane.
- Do not operate the device in wet conditions or expose it to extreme temperatures beyond its specified operating range.
- Consult a qualified automotive technician if you are unsure about any installation or operation procedures.
- Always wear appropriate personal protective equipment, such as safety glasses, when working on vehicles.
Produkt ponadview
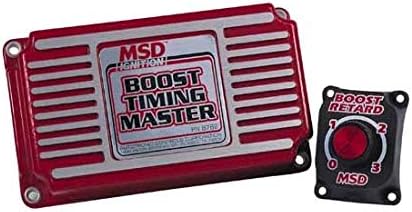
Image: The MSD 8762 Boost Timing Master unit (red and silver rectangular box) shown alongside its separate black boost retard adjustment dial. The main unit features 'MSD IGNITION' and 'BOOST TIMING MASTER' text. The smaller dial has 'BOOST RETARD' text and a rotary knob with settings from 0 to 3.
The MSD 8762 system consists of the main control unit and a remote boost retard adjustment dial. The main unit processes signals from your ignition system and manifold pressure sensor to apply the programmed timing retard. The remote dial allows for easy, on-the-fly adjustments to the amount of timing retard based on boost pressure.
Konfiguracja i instalacja
Proper installation is crucial for the correct function of the Boost Timing Master. Refer to the detailed wiring diagram included with your product packaging for specific connections. General steps include:
- Montaż urządzenia: Select a secure, dry location away from excessive heat, vibration, and direct engine heat. Ensure adequate ventilation.
- Połączenia elektryczne:
- Connect the power and ground wires directly to the battery or a reliable power source.
- Integrate the timing control wires with your existing ignition system as per the wiring diagram. This typically involves connecting to the distributor or crank trigger signal.
- Connect the boost pressure sensor input to a reliable manifold pressure source.
- Connect the remote boost retard dial to the main unit.
- Konfiguracja wstępna: Before starting the engine, double-check all connections. Ensure the remote dial is set to the desired initial retard value, typically '0' for initial testing.
Instrukcja obsługi
Once installed, the Boost Timing Master operates automatically based on boost pressure. The primary user interaction is through the remote boost retard dial.
- Boost Retard Adjustment: The remote dial allows you to select the amount of timing retard per pound of boost. Refer to your engine's specific requirements and tuning guidelines for optimal settings. Start with conservative settings and gradually increase if necessary, monitoring for signs of detonation.
- Monitorowanie: It is highly recommended to monitor engine performance, especially timing and knock, using appropriate diagnostic tools during initial setup and tuning.
Konserwacja
The MSD 8762 Boost Timing Master is designed for long-term reliability with minimal maintenance. However, periodic checks can ensure optimal performance:
- Kontrola okablowania: Periodically inspect all wiring connections for signs of wear, corrosion, or looseness. Secure any loose connections and repair damaged insulation.
- Czystość jednostki: Keep the unit clean and free of dirt, dust, and moisture. Use a soft, dry cloth for cleaning. Do not use harsh chemicals or abrasive cleaners.
- Kontrola środowiskowa: Ensure the mounting location remains free from excessive heat or moisture.
Rozwiązywanie problemów
If you experience issues with your Boost Timing Master, consult the following common troubleshooting steps:
| Problem | Możliwa przyczyna | Rozwiązanie |
|---|---|---|
| No timing retard observed | Incorrect wiring; Faulty boost signal; Dial set to '0' | Verify all wiring connections; Check boost sensor and signal; Adjust dial to desired retard setting. |
| Engine misfires under boost | Excessive timing retard; Other ignition system issues | Reduce retard setting; Inspect spark plugs, ignition coils, and wires. |
| Jednostka nie włącza się | No power supply; Blown fuse; Loose ground connection | Check power and ground connections; Inspect vehicle's fuse box; Ensure ground is secure. |
If problems persist after following these steps, contact MSD technical support or a qualified automotive technician.
Specyfikacje
- Wymiary produktu: 10 x 6 x 3 cala
- Producent: MSD
- ASIN: B003AOSN1G
- Kolor: Czerwony
- Typ wyświetlacza: LCD or LED (referring to compatible external displays, not built-in)
- Temperatura pracy: Do 85 stopni Celsjusza
Informacje o gwarancji
Specific warranty details for the MSD 8762 Boost Timing Master are typically provided with the product packaging or available on the official MSD webwitryna. Prosimy o zapoznanie się z poniższymi źródłami, aby uzyskać najbardziej dokładne i aktualne warunki gwarancji.
Obsługa klienta
For technical assistance, installation questions, or troubleshooting beyond the scope of this manual, please contact MSD customer support. Visit the official MSD webStrona zawierająca informacje kontaktowe, odpowiedzi na często zadawane pytania i dodatkowe zasoby.
Note: Always refer to the latest documentation provided by the manufacturer for the most accurate and up-to-date information.