FineMolds FM28
FineMolds 1/35 Imperial Army Type 5 Medium Tank Chi-Ri Plastic Model Kit Instruction Manual
Numer modelu: FM28
Wstęp
This manual provides detailed instructions for the assembly, painting, and care of your FineMolds 1/35 Imperial Army Type 5 Medium Tank Chi-Ri plastic model kit (FM28). Please read all instructions carefully before beginning assembly.
Ważny: This is a plastic model kit requiring assembly and painting. Tools, adhesives, and paints are sold separately and are necessary for completion.
Zalecany wiek: 8 lat i więcej.
Zawartość zestawu
The kit contains plastic sprues with all components required to build one 1/35 scale Imperial Army Type 5 Medium Tank Chi-Ri. Please verify all parts are present and undamaged before starting assembly.

Rysunek 1: The kit box art for the FineMolds 1/35 Imperial Army Type 5 Medium Tank Chi-Ri. This image illustrates the completed model and provides painting inspiration.
Required Tools and Materials (Sold Separately)
- Plastic nippers or hobby knife for cutting parts from sprues.
- Plastic cement (liquid or tube type) for bonding plastic parts.
- Sandpaper or sanding sticks for cleaning mold lines and smoothing parts.
- Paints (acrylic, enamel, or lacquer) and brushes or airbrush for painting.
- Thinners and cleaning solutions appropriate for your chosen paints.
- Tweezers for handling small parts.
- Masking tape for painting details.
Instrukcja montażu
1. Przygotowanie
- Carefully cut parts from the sprues using nippers or a hobby knife.
- Remove any excess plastic (flash) or mold lines using a hobby knife or sandpaper.
- Test fit parts before applying adhesive to ensure proper alignment.
2. Main Gun Assembly
Assemble the main gun components as indicated in the kit's diagram. Pay close attention to the orientation of the barrel and breech parts.
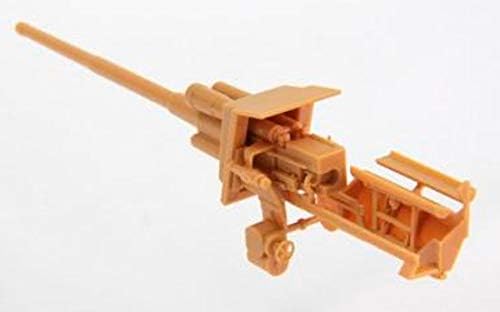
Rysunek 2: Szczegółowy view of the main gun components before assembly. Ensure all parts are clean and free of flash.
3. Montaż torów
The kit features individual track links. Assemble these carefully, ensuring correct alignment and tension. It is recommended to assemble sections of tracks and allow them to dry before fitting them to the road wheels.

Rysunek 3: Individual track links provided in the kit. These require careful assembly to form the complete track runs.
4. Hull and Turret Assembly
Follow the kit's instructions for assembling the lower and upper hull sections, road wheels, suspension, and turret. Ensure all seams are clean and filled if necessary.

Rysunek 4: Przód view of the assembled hull and turret, showing the main gun and machine guns. Note the detail on the front glacis plate.

Rysunek 5: Tył view of the assembled model, highlighting the engine deck, exhaust, and track details.
Malowanie i wykańczanie
Once assembly is complete and all adhesive has fully cured, the model is ready for painting. Refer to historical references or the kit box art for color schemes.
- Clean the model thoroughly to remove any dust or grease.
- Apply a primer coat for better paint adhesion and a uniform base color.
- Paint the base colors, followed by camouflage patterns if desired.
- Add details such as tools, machine guns, and track colors.
- Apply decals according to the kit instructions.
- Consider weathering techniques (washes, drybrushing, pigments) to enhance realism.
- Apply a clear coat (matte or satin) to protect the paint and decals.

Rysunek 6: A completed and painted model of the FineMolds Chi-Ri tank, showcasing the final appearance after assembly and finishing.
Care of the Finished Model
To maintain the appearance of your completed model:
- Keep the model away from direct sunlight to prevent paint fading.
- Unikaj ekstremalnych zmian temperatury.
- Delikatnie zetrzyj kurz miękką szczotką lub sprężonym powietrzem. Unikaj agresywnych środków czyszczących.
- Trzymaj model za podstawę lub solidne sekcje, aby zapobiec uszkodzeniu delikatnych części.
Rozwiązywanie typowych problemów z montażem
- Części nie pasujące: Ensure all mold lines and flash are removed. Test fit parts before applying glue. If necessary, gently sand contact surfaces.
- Gaps between parts: Use plastic filler putty to fill any noticeable gaps after assembly. Sand smooth once dry.
- Broken small parts: If a small part breaks, attempt to re-attach it with a small amount of plastic cement or super glue. For very delicate parts, consider replacing with stretched sprue or wire.
- Decal silvering: Apply decals to a glossy surface. Use decal setting solutions to help them conform to surface details and eliminate air bubbles.
Specyfikacja produktu
| Marka | FineMolds |
| Numer modelu | FM28 |
| Skala | 1/35 |
| Wymiary produktu (po złożeniu) | Około 13.62 x 7.8 x 3.54 cala (34.6 x 19.8 x 9 cm) |
| Waga przedmiotu (zestaw) | 1.54 funtów (0.7 kg) |
| Zalecany wiek producenta | 8 lata i więcej |
| ASIN | B002JYAURS |
Wsparcie i dalsze informacje
For additional support or inquiries regarding this product, please contact FineMolds directly or refer to their official webstrona. Visit FineMolds Official Webstrona
Ask a question about this manual
Ask about setup, troubleshooting, compatibility, parts, safety, or missing instructions. Manuals+ will review the question and use this page’s manual context to help answer it.