1. Wprowadzenie
The Nova IceProbe Thermoelectric Aquarium Chiller is designed to provide a reliable cooling solution for small aquariums. Utilizing advanced thermoelectric technology, this unit efficiently converts electricity into cooling power to maintain desired water temperatures. This manual provides essential information for the proper installation, operation, and maintenance of your IceProbe chiller.
2. Informacje dotyczące bezpieczeństwa
- Przed przystąpieniem do prac konserwacyjnych lub instalacyjnych należy zawsze odłączyć zasilanie.
- Upewnij się, że napięcie zasilaniatage matches the chiller's requirements (120V).
- Nie należy używać chłodziarki, jeśli przewód zasilający lub wtyczka są uszkodzone.
- Keep the chiller's fan area clear of obstructions to ensure proper airflow and prevent overheating.
- This device is intended for indoor use with aquariums only.
- A drip loop should be created for all power cords to prevent water from traveling along the cord and reaching electrical outlets.
3. Zawartość opakowania
Po otwarciu opakowania należy sprawdzić, czy wszystkie elementy są obecne i nieuszkodzone:
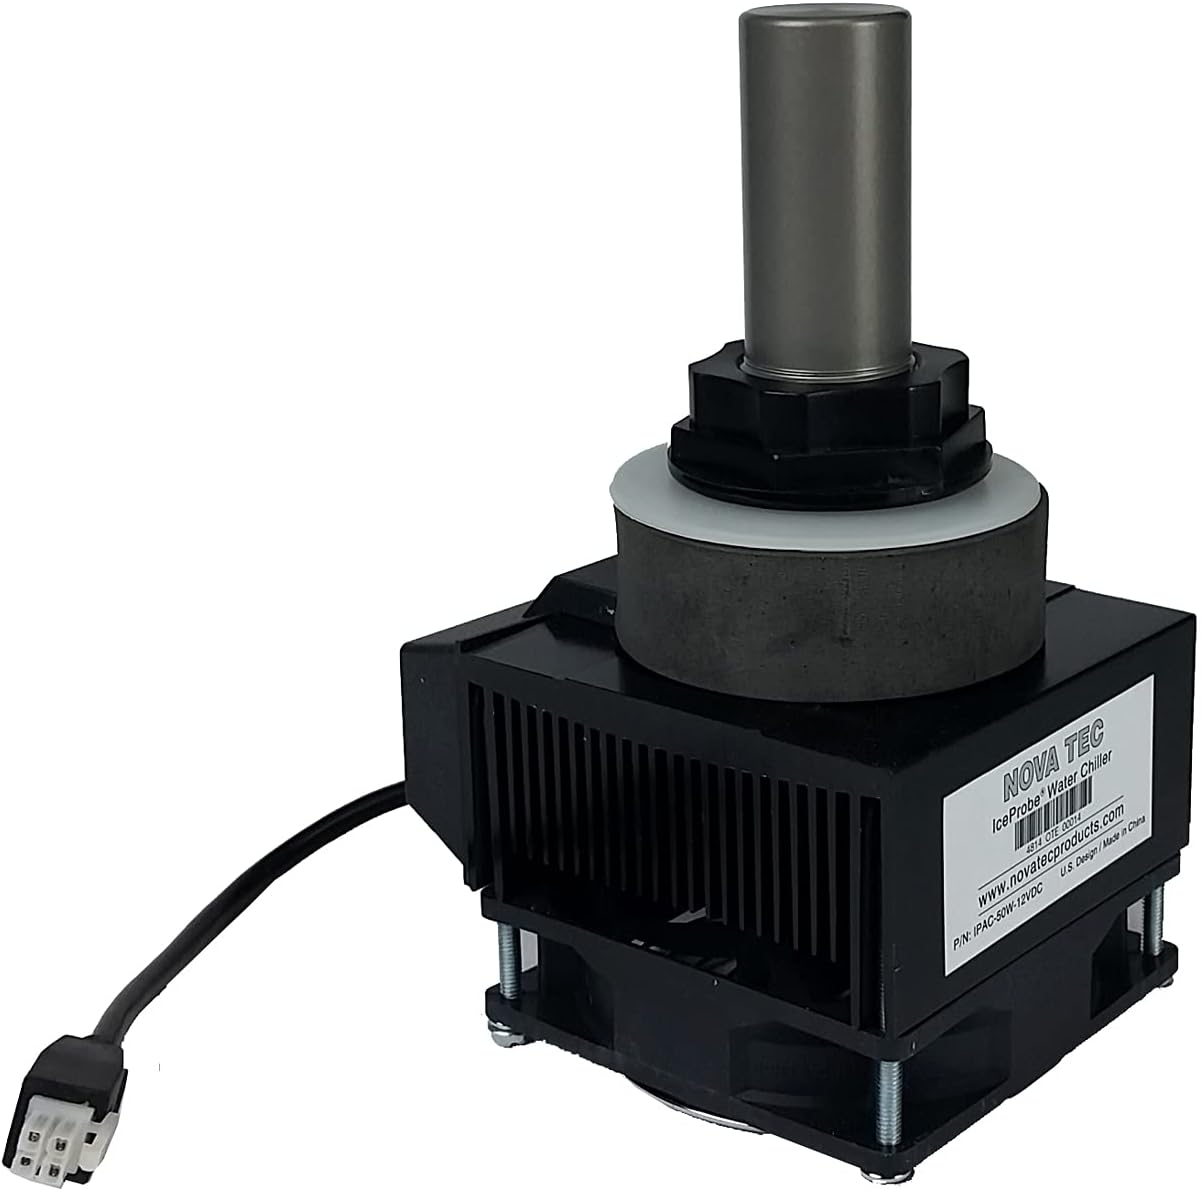
- Nova IceProbe Thermoelectric Aquarium Chiller unit
- Watertight securing nut
- Silicon washer
- Power cord (5' 9" length)
- Probe cord (6' length)
4. Specyfikacje
| Numer modelu | IPAC-50W-120V |
| Dimensions (Unit with probe) | 4" (W) x 4 3/4" (D) x 7 1/2" (H) |
| Długość przewodu zasilającego | 5'9" |
| Długość przewodu sondy | 6' |
| Producent | NOVA TEC |
| Kraj pochodzenia | Chiny |
5. Instrukcje konfiguracji
The IceProbe chiller is designed for easy integration into various aquarium setups, including siphon overflows, prefilters, sumps, or directly into plastic aquariums. Installation requires drilling a 1 1/4" hole.
- Przygotuj miejsce instalacji: Identify a suitable location for the chiller. This could be a bulkhead in a sump, an overflow box, or a drilled hole in a plastic aquarium wall. Ensure there is at least 3-1/8" minimum interior clearance for the cooling probe and 1" air circulation space around the exterior fan unit.
- Wywierć otwór: Carefully drill a 1 1/4" diameter hole at the chosen installation point. Ensure the hole is clean and free of debris.
- Włóż sondę: Insert the cooling probe through the drilled hole from the inside of the aquarium/sump.
- Zabezpiecz jednostkę: Place the silicon washer over the probe on the exterior side of the aquarium/sump, followed by the watertight securing nut. Tighten the nut firmly by hand to create a secure, watertight seal. Do not overtighten.
- Position the Chiller: Ensure the exterior fan unit is positioned to allow for adequate airflow. The fan should not be obstructed.
- Connect to Temperature Controller: The IceProbe chiller does not have an integrated on/off switch or temperature controller. It provides continuous chilling when powered. To regulate the aquarium temperature, you musieć connect the chiller to a separate, external temperature controller (not included). This controller will turn the chiller on and off based on your set temperature parameters.
- Podłączenie zasilania: Once the chiller is securely installed and connected to a temperature controller, plug the temperature controller into a power outlet. Ensure a drip loop is formed with the power cord.

6. Instrukcja obsługi
The IceProbe chiller operates continuously when powered. Its cooling function is managed by an external temperature controller. Follow these guidelines for optimal performance:
- Kontrola temperatury: Set your desired temperature range on your external temperature controller. The controller will activate the chiller when the water temperature exceeds the upper limit and deactivate it when the temperature falls below the lower limit.
- Wydajność chłodzenia: The cooling capacity of a single IceProbe unit varies with water volume and ambient air temperature. Refer to the "Typical Temperature Pulldown" chart below for estimated performance.
- Wiele jednostek: For larger aquariums or greater temperature reduction, multiple IceProbe units can be used.
- Przepływ powietrza: Ensure the fan on the exterior unit has unrestricted airflow. Blocked airflow will reduce cooling efficiency and may lead to overheating.
Typical Temperature Pulldown (°F)

| Chłodziarki | Galony wody | ||
|---|---|---|---|
| 10 | 20 | 40 | |
| 1 | 6-8 | 3-4 | 1-2 |
| 2 | 10-12 | 6-8 | 3-4 |
Note: These values are approximate and can vary based on ambient room temperature, aquarium insulation, water circulation, and other environmental factors.
7. Konserwacja
Regular maintenance ensures the longevity and efficient operation of your IceProbe chiller.
- Wyczyść wentylator: Periodically inspect the fan on the exterior unit for dust and debris accumulation. Gently clean with a soft brush or compressed air to ensure optimal airflow.
- Sprawdź sondę: Check the cooling probe inside the aquarium for any algae or mineral buildup. Clean gently with a soft cloth or sponge if necessary.
- Sprawdź połączenia: Ensure all electrical connections are secure and the watertight securing nut remains tight.
- Jakość wody: Maintaining good aquarium water quality will help prevent excessive buildup on the cooling probe.
8. Rozwiązywanie Problemów
If you encounter issues with your IceProbe chiller, consider the following common troubleshooting steps:
- Chiller Not Cooling:
- Verify the chiller is receiving power from the temperature controller.
- Check the temperature controller settings to ensure it is set to activate the chiller.
- Ensure the fan on the exterior unit is spinning and not obstructed.
- Confirm the cooling probe is submerged in water.
- Check for excessive dust or debris on the fan or cooling probe.
- Niewystarczające chłodzenie:
- Ensure adequate air circulation around the exterior fan unit.
- Verify the aquarium size is within the recommended cooling capacity (refer to the "Typical Temperature Pulldown" chart). For larger tanks or greater temperature drops, consider adding a second IceProbe unit.
- Check ambient room temperature; higher room temperatures will reduce cooling efficiency.
- Ensure the cooling probe is clean and free of buildup.
- Nietypowy hałas:
- Inspect the fan for any obstructions or loose components.
- Upewnij się, że urządzenie jest solidnie zamontowane i nie wibruje, uderzając o inne powierzchnie.
Jeśli wykonanie powyższych czynności nie pomoże w rozwiązaniu problemu, skontaktuj się z obsługą klienta.
9. Informacje o gwarancji
The Nova IceProbe Thermoelectric Aquarium Chiller unit comes with a one-year warranty against defects in materials and workmanship from the date of purchase. This warranty covers manufacturing defects under normal use. It does not cover damage resulting from misuse, neglect, improper installation, accidents, or unauthorized repairs.
For warranty claims, please retain your proof of purchase and contact customer support.
10. Obsługa klienta
For technical assistance, troubleshooting guidance beyond this manual, or warranty inquiries, please contact NOVA TEC customer support. Refer to the manufacturer's webna stronie internetowej lub opakowaniu produktu, aby uzyskać najaktualniejsze dane kontaktowe.
Producent: NOVA TEC