
1. Wprowadzenie
This manual provides comprehensive instructions for the setup, operation, and maintenance of your KitVision 7-inch Digital Photo Frame, model DPF7BKK. Please read this manual thoroughly before using the device to ensure proper functionality and longevity.

Rycina 1: Przód view of the KitVision 7-inch Digital Photo Frame. The frame is silver with a black bezel, displaying a vibrant image of a person holding a child on a beach.
2. Zawartość opakowania
Sprawdź, czy w przesyłce znajdują się wszystkie wymienione poniżej elementy:
- KitVision 7-inch Digital Photo Frame (DPF7BKK)
- Zasilacz sieciowy
- Odłączany stojak
- Instrukcja obsługi (ten dokument)

Figure 2: The product packaging for the KitVision 7-inch Digital Photo Frame. The box features a blue background with wave patterns and an image of the digital photo frame displaying a beach scene.
3. Koniec produktuview
3.1. Rear Panel and Controls

Rysunek 3: Tył view of the digital photo frame. Visible features include the USB port, SD/MMC/MS card slot, DC power input, control buttons (ENTER, arrows, MENU, STANDBY), and a detachable stand.
- Port USB: Do podłączania dysków flash USB.
- SD/MMC/MS Card Slot: Do wkładania kompatybilnych kart pamięci.
- Wejście DC: Power connection port for the AC adapter.
- Przyciski sterujące:
- WCHODZIĆ: Potwierdza wybór.
- < / > (Left/Right Arrows): Navigates through menus and images.
- ^ / v (Up/Down Arrows): Nawigacja po menu i opcjach.
- MENU: Dostęp do menu głównego.
- CZEKAJ: Powers the frame on or off.
- Odłączana podstawka: Allows for tabletop placement in landscape or portrait orientation.
- Otwór do montażu na ścianie: Do montażu ramki na ścianie.
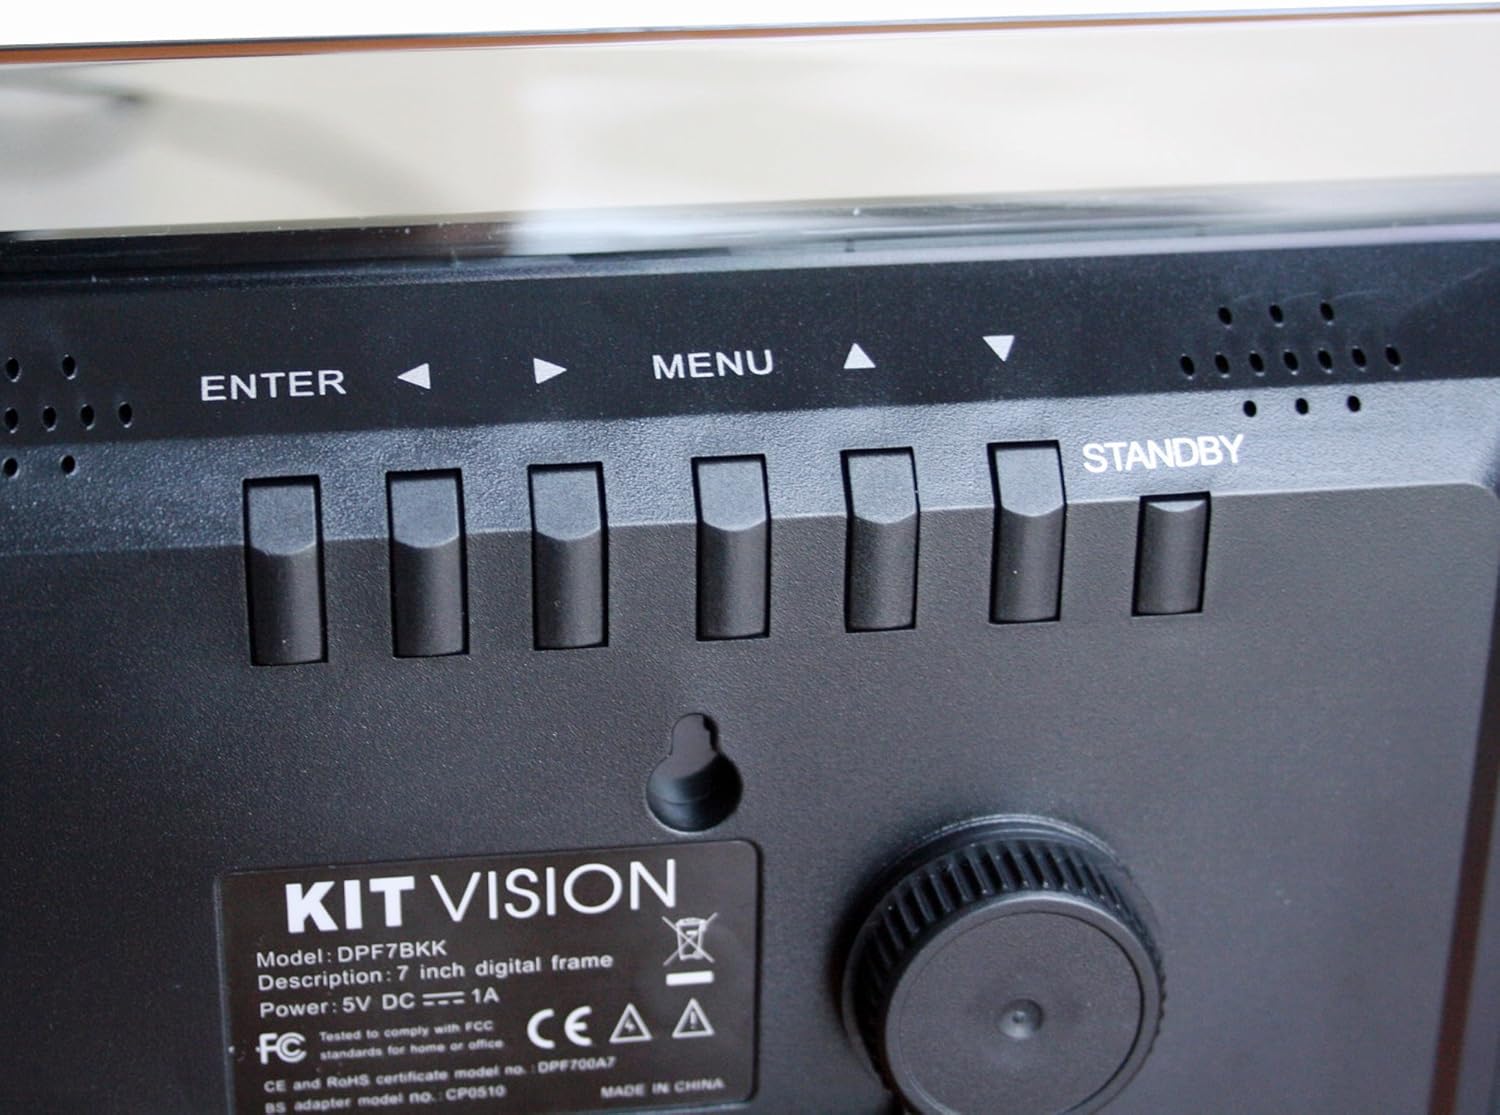
Rysunek 4: Zbliżenie view of the control buttons and product label on the rear of the digital photo frame. The label clearly shows "KITVISION", "Model: DPF7BKK", and power specifications.
4. Konfiguracja
4.1. Mocowanie stojaka
- Locate the detachable stand in the package.
- Insert the stand's peg into the designated hole on the rear of the photo frame.
- Rotate the stand to secure it in place and adjust the angle for optimal viewing. The stand supports both landscape and portrait orientations.
4.2. Podłączenie zasilania
- Connect the AC power adapter to the DC input port on the rear of the frame.
- Podłącz drugi koniec zasilacza do standardowego gniazdka elektrycznego.
- The frame will typically power on automatically or can be turned on using the STANDBY button.
4.3. Inserting a Memory Card or USB Drive
The frame supports SD, MMC, MS memory cards, and USB flash drives. Ensure your photos are in a compatible format (e.g., JPEG).
- Carefully insert your memory card into the SD/MMC/MS slot or your USB flash drive into the USB port.
- Ensure the card or drive is inserted correctly and fully seated. Do not force it.
- The frame should automatically detect the storage device and begin displaying photos, or prompt you to select a source.
5. Instrukcja obsługi
5.1. Podstawowa nawigacja
- Użyj </> (Left/Right) and Bibliografia (Up/Down) arrow buttons to navigate through menus and select options.
- Naciśnij WCHODZIĆ button to confirm a selection or open a sub-menu.
- Naciśnij MENU button to return to the previous menu or access the main menu from a slideshow.
- Naciśnij i przytrzymaj CZEKAJ button to power the frame off or on.
5.2. ViewZdjęcia
Once a memory card or USB drive is inserted, the frame will typically start a slideshow automatically. If not, navigate to the "Photo" or "Slideshow" option in the main menu and press WCHODZIĆ.
5.3. Ustawienia pokazu slajdów
To customize your slideshow:
- Naciśnij MENU przycisk, aby uzyskać dostęp do menu głównego.
- Navigate to "Settings" or "Slideshow Options" using the arrow buttons and press WCHODZIĆ.
- Dostosuj ustawienia takie jak:
- Czas wyświetlania: Duration each photo is shown.
- Efekt przejścia: How photos change (e.g., fade, wipe).
- Tryb powtarzania: Loop all photos or play once.
- Zamówienie zdjęć: Sequential or random.
- Naciskać WCHODZIĆ aby potwierdzić zmiany i MENU wyjść.
6. Konserwacja
6.1. Czyszczenie ramy
- Zawsze odłączaj zasilacz przed czyszczeniem.
- Do delikatnego przecierania ekranu i ramki należy używać miękkiej, suchej i niepozostawiającej włókien ściereczki.
- W przypadku uporczywych plam na ekranie delikatnie przetrzyjampPrzetrzyj ściereczkę wodą lub środkiem czyszczącym do ekranów. Nie rozpylaj płynu bezpośrednio na ekran.
- Unikaj stosowania środków czyszczących o działaniu ściernym, rozpuszczalników lub roztworów na bazie alkoholu, gdyż mogą one uszkodzić powierzchnię.
6.2. Przechowywanie
- When not in use for extended periods, store the digital photo frame in a cool, dry place, away from direct sunlight and extreme temperatures.
- It is recommended to store the frame in its original packaging to protect it from dust and physical damage.
7. Rozwiązywanie Problemów
| Problem | Możliwa przyczyna | Rozwiązanie |
|---|---|---|
| Ramka się nie włącza. | No power, faulty adapter, or STANDBY button not pressed. | Ensure power adapter is securely connected to both the frame and a working electrical outlet. Press the STANDBY button. Try a different outlet. |
| Brak wyświetlonych obrazów. | No memory card/USB, incompatible file format, or card/USB not inserted correctly. | Insert a memory card or USB drive with compatible image files (JPEG). Ensure it is fully seated. Check if the frame is set to the correct source input in the menu. |
| Obrazy wydają się zniekształcone lub niskiej jakości. | Low resolution images, damaged memory card/USB, or screen issue. | Use higher resolution images. Try a different memory card or USB drive. Clean the screen. |
| Przyciski nie reagują. | Tymczasowy błąd oprogramowania. | Disconnect the power adapter, wait 10 seconds, then reconnect it to reset the device. |
8. Specyfikacje
| Numer modelu | DPF7BKK |
| Rozmiar ekranu | 7 cali |
| Rezolucja | WXGA |
| Wymiary produktu | 9.06 x 6.5 x 1.26 cala |
| Waga przedmiotu | 0.012 uncji |
| Technologia łączności | USB |
| Źródło zasilania | Corded Electric (5V DC === 1A) |
| Obsługiwane karty pamięci | SD, MMC, MS |
| Obsługiwane formaty obrazu | JPEG (common format, specific list not provided in input) |
9. Gwarancja i wsparcie
For warranty information and technical support, please refer to the documentation provided at the time of purchase or contact KitVision customer service. Specific warranty terms may vary by region and retailer.