
1. Wprowadzenie
This manual provides detailed instructions for the safe installation, operation, and maintenance of your Emerald P401TSW 6-inch Recessed Ceiling Light Fixture Kit. Please read all instructions carefully before beginning installation and retain this manual for future reference. Proper installation is crucial for safety and optimal performance.
2. Informacje dotyczące bezpieczeństwa
WARNING: RISK OF ELECTRIC SHOCK. Disconnect power at the circuit breaker or fuse box before installation or servicing. Failure to do so may result in serious injury or death.
- Wszystkie połączenia elektryczne muszą być zgodne z lokalnymi przepisami, rozporządzeniami i Krajowym Kodeksem Elektrycznym (NEC).
- Jeśli nie masz pewności co do procedur związanych z okablowaniem, skonsultuj się z wykwalifikowanym elektrykiem.
- Podczas montażu należy nosić okulary ochronne i rękawice.
- Upewnij się, że urządzenie jest prawidłowo uziemione.
- Do not install insulation within 3 inches of the fixture housing.
- This fixture is designed for indoor use in dry or damp tylko lokalizacje.
3. Zawartość opakowania
Przed rozpoczęciem instalacji sprawdź, czy wszystkie komponenty są obecne:
- Recessed Housing (1)
- White Trim Ring (1)
- Frosted Glass Diffuser (1)
- Sprzęt montażowy (śruby, nakrętki druciane)
- Instrukcja obsługi (ten dokument)
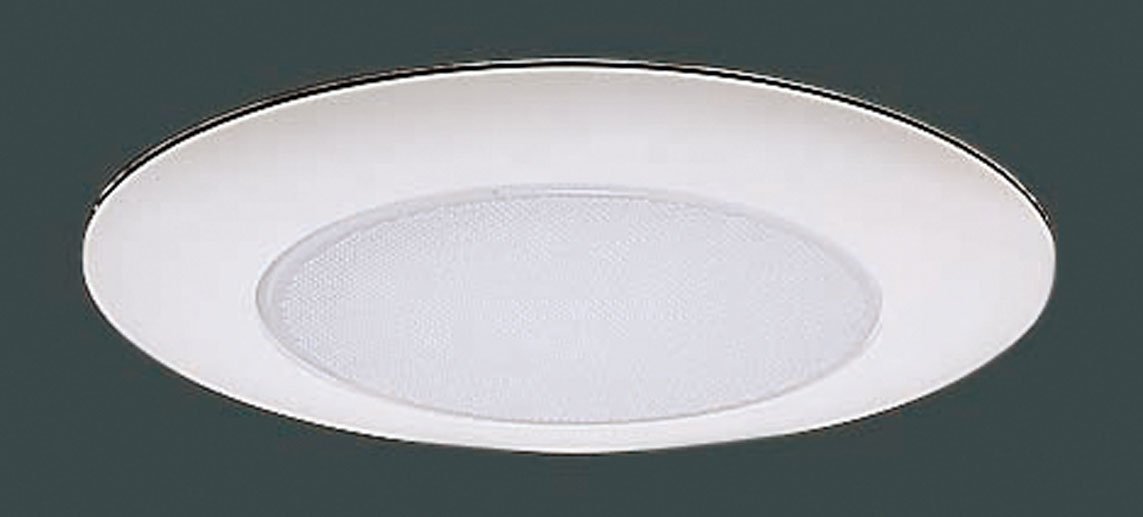
Image: Components of the Emerald P401TSW recessed light kit, showing the housing, white trim, and frosted glass diffuser.
4. Wymagane narzędzia
Do instalacji potrzebne są zazwyczaj następujące narzędzia:
- Śrubokręt krzyżakowy
- Wkrętak płaski
- Ściągacze izolacji
- Taśma miernicza
- Ołówek
- Drill with Hole Saw (6-1/4 inch recommended for a snug fit)
- Utility Knife (optional, for drywall)
- Okulary ochronne
5. Instrukcje instalacji
Follow these steps carefully to install your recessed light fixture. This kit is designed for both new construction and remodel applications.
Krok 1: Przygotuj się do instalacji
- Wyłącz zasilanie: Locate the circuit breaker or fuse box controlling the area where you will install the fixture and turn off the power. Verify power is off using a voltagtester.
- Określ lokalizację: Choose a suitable location on the ceiling, ensuring there are no obstructions (joists, pipes, wires) behind the drywall.
- Mark and cut hole: Using a measuring tape and pencil, mark the center of your desired fixture location. Use a 6-1/4 inch hole saw to cut a circular opening in the drywall. Note: A slightly larger hole (e.g., 6-3/8 inch) may be necessary for easier installation and to prevent drywall damage, as reported by some users. Test fit before final wiring.
Krok 2: Podłączanie oprawy
- Open junction box: Open the access plate on the fixture's junction box.
- Podłącz przewody: Feed the electrical supply wires through the knockout hole into the junction box. Using wire nuts, connect the wires as follows:
- Połącz czarny (hot) wire from the supply to the czarny wire of the fixture.
- Połącz biały (neutral) wire from the supply to the biały wire of the fixture.
- Połącz goła miedź or zielony (ground) wire from the supply to the zielony ground screw or wire in the junction box.
- Bezpieczne okablowanie: Ensure all connections are secure. Carefully tuck all wires and wire nuts into the junction box and close the access plate.
Step 3: Installing the Housing
- Insert housing: Carefully push the recessed housing up into the ceiling opening.
- Bezpieczne zakwaterowanie: The housing features spring clips or tension clips. Push these clips outwards and upwards to secure the housing firmly against the ceiling drywall. Ensure the housing is flush and level with the ceiling surface. If the housing does not sit level, it may require minor adjustment or shimming before proceeding.
Step 4: Installing the Trim and Glass
- Install bulb: Screw in the appropriate bulb (not included) into the socket. Refer to the specifications section for bulb type and wattage.
- Attach glass diffuser: Place the frosted glass diffuser into the trim ring.
- Montaż listwy wykończeniowej: Align the trim ring with the housing. The trim typically has torsion springs or clips that attach to brackets inside the housing. Gently push the trim upwards until it snaps securely into place, flush with the ceiling.
Krok 5: Ostatnie kroki
- Przywróć zasilanie: Włącz ponownie zasilanie za pomocą wyłącznika obwodu lub skrzynki bezpiecznikowej.
- Test fixture: Turn on the light switch to ensure the fixture is operating correctly.
6. Instrukcja obsługi
Once installed, the Emerald P401TSW recessed light fixture operates like any standard ceiling light. Control it using a wall switch connected to the circuit. To replace the bulb, ensure power is off, allow the bulb to cool, then unscrew the old bulb and screw in a new one of the correct type and wattage.
7. Konserwacja
- Czyszczenie: Disconnect power before cleaning. Wipe the trim and glass diffuser with a soft, damp ściereczką. Nie używaj środków czyszczących o właściwościach ściernych ani rozpuszczalników, ponieważ mogą one uszkodzić wykończenie.
- Wymiana żarówki: Always turn off power before replacing a bulb. Allow the bulb to cool completely. Use only bulbs that meet the specifications listed in this manual.
- Kontrola: Okresowo sprawdzaj, czy oprawa nie nosi śladów uszkodzeń lub luźnych połączeń. W przypadku stwierdzenia jakichkolwiek problemów odłącz zasilanie i skonsultuj się z wykwalifikowanym elektrykiem.
8. Rozwiązywanie Problemów
| Problem | Możliwa przyczyna | Rozwiązanie |
|---|---|---|
| Światło się nie włącza | Brak mocy do mocowania Luźne połączenie przewodów Uszkodzona żarówka | Sprawdź wyłącznik/bezpiecznik Verify all wire connections are secure (power off) Wymień żarówkę |
| Migotanie światła | Luźne połączenie przewodów Nieprawidłowy typ żarówki Niezgodność ściemniacza | Check wire connections (power off) Upewnij się, że typ i moc żarówki są prawidłowetage Verify dimmer is compatible with bulb type |
| Fixture is not flush with ceiling | Improperly seated clips Hole cut too small | Re-seat spring clips firmly Carefully enlarge hole slightly if necessary (power off) |
9. Specyfikacje
- Model: P401TSW
- Typ oprawy: Recessed Ceiling Light Kit
- Rozmiar: 6-inch (nominal opening)
- Wykończenie wykończenia: Biały
- Szkło: Frosted Diffuser
- Tomtage: 120V AC 60Hz
- Typ żarówki: Incandescent, LED, or CFL compatible (bulb not included)
- Maksymalna moctage: 60W (or equivalent LED/CFL)
- Ocena lokalizacji: Suche lub Damp
10. Informacje o gwarancji
This Emerald product is covered by a limited warranty against defects in materials and workmanship. Please refer to the warranty card included with your purchase or visit the manufacturer's webSzczegółowe warunki i postanowienia znajdziesz na stronie. Zachowaj dowód zakupu na wypadek roszczeń gwarancyjnych.
11. Obsługa klienta
For technical assistance, missing parts, or warranty inquiries, please contact Emerald customer support. Refer to the packaging or the manufacturer's official website for current contact information (phone number, email, or support portal).