
1. Wprowadzenie
This manual provides instructions for the setup, operation, maintenance, and troubleshooting of the InFocus LP540 Multimedia Video Projector. The LP540 is designed for presenting visual content with an XGA 1024x768 native resolution and 1700 ANSI lumens brightness. It features a zoom lens with manual focus and zoom adjustment, and includes a 2-watt speaker for audio output.
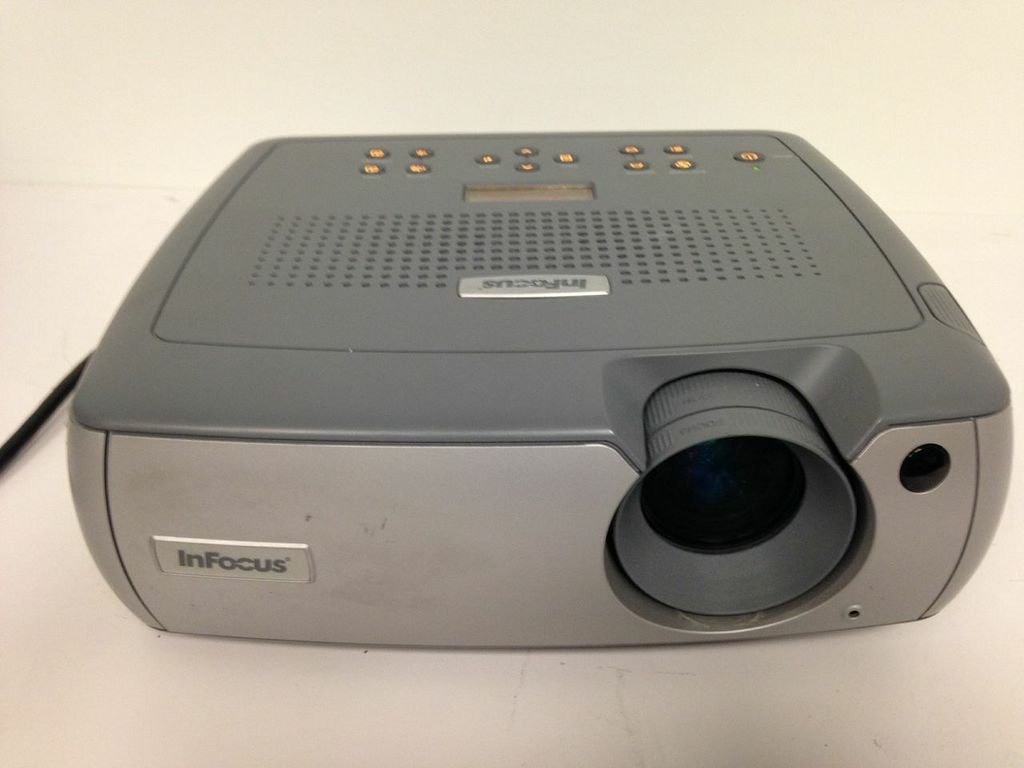
Rysunek 1: Widok z przodu view of the InFocus LP540 Projector, showing the lens and InFocus branding.
2. Konfiguracja
2.1 Rozpakowanie i zawartość
Carefully unpack the projector and verify that all components are present:
- InFocus LP540 Projector
- Navigator remote control
- Przewód zasilający
- M1-A computer cable with USB mouse
- 3.5mm computer audio cable
- Kabel audio/wideo RCA
- Paski kablowe oznaczone kolorami
- Miękki futerał
- User's guide and CD
2.2 Umiejscowienie projektora
The LP540 supports front, rear, and ceiling projection methods. For optimal image quality, place the projector on a stable, flat surface or mount it securely. Ensure adequate ventilation around the unit.
2.3 Podłączanie zasilania
- Podłącz przewód zasilający do gniazda zasilania projektora.
- Podłącz drugi koniec przewodu zasilającego do uziemionego gniazdka elektrycznego.
2.4 Podłączanie źródeł wideo i audio
The LP540 offers various input ports for video and audio connections. Refer to Figure 2 for port locations.

Figure 2: Rear panel of the InFocus LP540 Projector, displaying monitor out, computer in, audio in, video in, and serial control ports.
- Dane wejściowe komputera: Use the M1-A computer cable to connect your computer to the 'computer 1' or 'computer in' port. The M1-A cable also supports USB mouse functionality.
- Wejście wideo: Connect video sources (e.g., DVD player, VCR) using the RCA audio/video cable to the 'video in' ports (yellow for video, red/white for audio).
- Wejście audio: For separate audio input from a computer, use the 3.5mm computer audio cable to connect to the 'audio in' port.
- Sterowanie szeregowe: The 'serial control' port (RS-232) allows for external control of the projector.
- Wyjście monitora: The 'monitor out' port allows you to connect an external monitor to display the same image as the projector.
2.5 Regulacja obrazu
After connecting and powering on, adjust the image:
- Centrum: Obróć pierścień ostrości na obiektywie, aż obraz będzie ostry i wyraźny.
- Brzęczenie: Adjust the zoom ring on the lens to achieve the desired image size. The projector can display images from 40 inches to 300 inches diagonally.
3. Obsługa projektora
3.1 Włączanie/wyłączanie
- Włączanie: Naciśnij przycisk zasilania na panelu sterowania projektora lub pilocie. Zaświeci się kontrolka zasilania.
- Aby wyłączyć: Press the power button again. The projector will enter a cooling cycle before completely shutting down. Do not unplug the projector during the cooling cycle.
3.2 Korzystanie z pilota zdalnego sterowania
The included navigator remote control allows for convenient operation of the projector from a distance. It provides access to menu navigation, input selection, volume control, and other functions.
3.3 Wybór źródła sygnału wejściowego
Use the 'Input' button on the projector's control panel or remote control to cycle through available input sources (e.g., Computer 1, Video). The projector will automatically detect active signals.
3.4 Menu ekranowe (OSD)
Press the 'Menu' button on the projector or remote to access the On-Screen Display. Use the arrow keys to navigate and 'Enter' to select options. The OSD allows adjustment of various settings:
- Ustawienia obrazu: Adjust brightness, contrast, color, tint, and sharpness.
- Ustawienia wyświetlania: Change aspect ratio, keystone correction, and projection method.
- Ustawienia audio: Kontrola głośności i wyciszanie.
- Ustawienia zaawansowane: Dostęp lamp timer, language, and other system options.
3.5 Wyjście audio
The projector features a built-in 2-watt speaker. Adjust the volume using the remote control or the OSD menu. Ensure external audio sources are properly connected to the 'audio in' ports.
3.6 Łączność bezprzewodowa (opcjonalnie)
The LP540 supports wireless connectivity with a LiteShow module (sold separately). Refer to the LiteShow module's documentation for installation and setup instructions.
4. Konserwacja
4.1 Łamp Care and Replacement
Projektor lamp ma skończony okres życia. Kiedy lamp life is nearing its end, a warning message may appear, or the image brightness may decrease significantly. Replace the lamp with an authorized InFocus replacement lamp only. Refer to the full user manual on the included CD for detailed lamp instrukcje wymiany.
4.2 Czyszczenie obiektywu
Use a soft, lint-free cloth specifically designed for optical lenses to gently clean the projector lens. Avoid using abrasive cleaners or excessive force, as this can scratch the lens surface.
4.3 Czyszczenie filtrów powietrza
Regularly clean the projector's air filters to ensure proper ventilation and prevent overheating. Dust and debris can accumulate, reducing cooling efficiency. Refer to the full user manual for filter location and cleaning procedures.
4.4 Ogólne czyszczenie
Wipe the projector's exterior casing z miękkim, damp cloth. Do not use harsh chemicals or solvents. Ensure the projector is powered off and unplugged before cleaning.
5. Rozwiązywanie Problemów
This section addresses common issues you may encounter with the InFocus LP540 projector. For more detailed troubleshooting, consult the complete user manual.
- Brak zasilania:
- Upewnij się, że przewód zasilający jest solidnie podłączony zarówno do projektora, jak i do sprawnego gniazdka elektrycznego.
- Check if the power indicator light is on. If not, try a different outlet.
- Brak obrazu na ekranie:
- Verify that the correct input source is selected (e.g., Computer 1, Video).
- Sprawdź, czy wszystkie kable wideo są dobrze podłączone.
- Ensure the computer or video source is powered on and outputting a signal.
- Adjust the projector's brightness and contrast settings via the OSD menu.
- Słaba jakość obrazu (rozmazany, zniekształcony, nieprawidłowe kolory):
- Adjust the focus and zoom rings on the lens.
- Check the resolution settings on your computer to ensure they are compatible with the projector's native resolution (1024x768).
- Perform keystone correction if the image is trapezoidal.
- Adjust color, tint, and sharpness settings in the OSD menu.
- Brak dźwięku:
- Ensure audio cables are securely connected to the 'audio in' port.
- Check the volume level on the projector and the audio source.
- Verify that the projector is not muted.
- Pilot nie działa:
- Sprawdź i wymień baterie w pilocie.
- Upewnij się, że nie ma żadnych przeszkód między pilotem a odbiornikiem podczerwieni projektora.
6. Specyfikacje
The following table details the technical specifications for the InFocus LP540 Multimedia Video Projector:
| Funkcja | Specyfikacja |
|---|---|
| Marka | W centrum uwagi |
| Nazwa modelu | LP540 |
| Typ wyświetlacza | LCD |
| Rozdzielczość natywna | 1024x768 (rozdzielczość XGA) |
| Jasność | 1700 ANSI Lumens (max.) |
| Współczynnik kontrastu | 400:1 |
| Rozmiar obrazu (przekątna) | 40 cala do 300 cala |
| Technologia łączności | USB |
| Łączność Hardware | USB |
| Funkcja specjalna | Wbudowane głośniki |
| Wyjście audio | Dwa głośniki 2-watowe |
| Lamp Cotage | 170 watów |
| Cotage (Razem) | 260 watów |
| Metoda kontroli | Remote, Keypad, RS-232 |
| Współczynnik kształtu | Przenośny |
| Typ montażu | Uchwyt na blat |
| Waga przedmiotu | 14.6 funtów |
| Certyfikacja testów zewnętrznych | UL |
| UPC | 797212604897 |
7. Informacje o gwarancji
The InFocus LP540 Projector comes with a 2-year projector warranty. Please retain your proof of purchase for warranty claims. For specific terms and conditions, refer to the warranty documentation included with your product or contact InFocus customer support.
8. Wsparcie
For further assistance, technical support, or service inquiries regarding your InFocus LP540 Multimedia Video Projector, please visit the official InFocus weblub skontaktuj się z działem obsługi klienta. Dane kontaktowe zazwyczaj można znaleźć na stronie producenta. website or in the full user manual provided on the included CD.