
1. Wprowadzenie
Dziękujemy za zakupasing the JVC RX-5000R AV Receiver. This manual provides detailed instructions for the proper setup, operation, and maintenance of your receiver. Please read this manual thoroughly before using the unit to ensure optimal performance and safety.
The JVC RX-5000R is an advanced audio/video receiver designed to deliver high-quality sound for your home entertainment system. It features Dolby Surround Pro Logic compatibility, providing 100 watts of output power per channel across five channels. With its 5 separate power ampLifier stages and 5.1-channel analog input, it supports multi-channel audio formats like Dolby Digital. The integrated RDS tuner allows for convenient radio listening with memory for up to 30 FM and 15 MW/LW stations. The receiver also includes a subwoofer output and 5 audio inputs for connecting various devices. A remote control is included for ease of use.
2. Ważne informacje dotyczące bezpieczeństwa
Always follow these basic safety precautions when using your JVC RX-5000R AV Receiver to reduce the risk of fire, electric shock, and injury:
- Źródło zasilania: Podłącz urządzenie wyłącznie do gniazdka sieciowego prądu przemiennego.tage określone na tylnym panelu.
- Wentylacja: Zapewnij odpowiednią wentylację. Nie blokuj otworów wentylacyjnych. Pozostaw wystarczająco dużo miejsca wokół urządzenia, aby zapewnić prawidłowy przepływ powietrza.
- Woda i wilgoć: Nie wystawiaj urządzenia na działanie deszczu ani wilgoci. Nie stawiaj na urządzeniu przedmiotów wypełnionych płynami, takich jak wazony.
- Ciepło: Trzymaj urządzenie z dala od źródeł ciepła, takich jak grzejniki, kratki wentylacyjne, piece lub inne urządzenia (w tym amp(lifiers) wytwarzające ciepło.
- Czyszczenie: Przed czyszczeniem odłącz urządzenie od gniazdka ściennego. Do czyszczenia użyj suchej ściereczki.
- Serwisowanie: Nie próbuj samodzielnie naprawiać tego produktu. Wszelkie czynności serwisowe należy powierzyć wykwalifikowanemu personelowi serwisowemu.
- Błyskawica: Odłącz urządzenie od zasilania podczas burzy z piorunami lub gdy nie jest używane przez dłuższy czas.
3. Konfiguracja i połączenia
This section guides you through connecting your JVC RX-5000R AV Receiver to your speakers, audio sources, and power supply.
3.1 Rozpakowanie
Carefully remove the receiver and all accessories from the packaging. Verify that all components are present:
- JVC RX-5000R AV Receiver
- Zdalne sterowanie
- Antena FM
- Antena pętlowa AM
- Przewód zasilający
- Instrukcja obsługi (ten dokument)
3.2 Połączenia głośników
The RX-5000R supports a 5.1 channel speaker configuration. Connect your speakers as follows:
- Głośniki przednie (lewy/prawy): Podłącz do zacisków FRONT L/R.
- Głośnik centralny: Podłącz do zacisku CENTER.
- Głośniki przestrzenne (lewy/prawy): Podłącz do zacisków SURROUND L/R.
- Głośnik niskotonowy: Connect an active subwoofer to the SUBWOOFER PRE OUT jack.
Notatka: Ensure correct polarity (+ to + and - to -) for all speaker connections to prevent phase issues and ensure optimal sound quality.
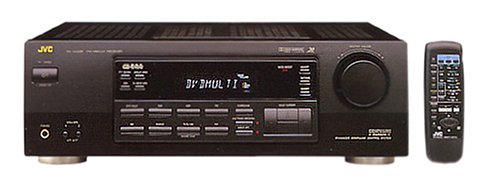
Figure 1: Rear panel of the JVC RX-5000R showing speaker and audio input terminals. This image illustrates the various connection points for speakers and external audio devices.
3.3 Połączenia źródeł dźwięku
Connect your audio components (CD player, DVD player, TV, etc.) to the appropriate audio input jacks on the rear panel.
- Wejścia audio analogowe: The receiver features 5 analog audio inputs. Use RCA cables to connect your devices to these inputs (e.g., CD, TAPE, VCR, DVD, TV).
- Cyfrowe wejścia audio: The receiver supports Optical and Coaxial digital audio inputs. Connect compatible devices (e.g., DVD player, game console) to these inputs for high-quality digital sound.
- 5.1 Channel Analog Input: For devices with multi-channel analog outputs (e.g., older DVD players with built-in Dolby Digital/DTS decoders), connect to the 5.1 CH INPUT jacks.
3.4 Połączenia antenowe
Podłącz dołączone anteny FM i AM, aby uzyskać odbiór radia.
- Antena FM: Connect the FM wire antenna to the FM 75Ω COAXIAL terminal. Extend the wire for best reception.
- Antena AM: Assemble the AM loop antenna and connect its wires to the AM terminals. Position the antenna for optimal reception.
3.5 Połączenie zasilania
After all audio and speaker connections are made, connect the power cord to the AC inlet on the receiver and then to a wall outlet.
4. Podstawowa obsługa
This section covers the fundamental operations of your JVC RX-5000R AV Receiver.
4.1 Włączanie/wyłączanie zasilania
Naciśnij MOC przycisk na panelu przednim lub pilocie, aby włączyć lub wyłączyć odbiornik.
4.2 Wybór wejścia
Użyj WYBÓR WEJŚCIA knob on the front panel or the corresponding input buttons (e.g., CD, DVD, TV/VCR) on the remote control to select your desired audio source.
4.3 Regulacja głośności
Dostosuj głośność główną za pomocą dużego pokrętła TOM pokrętło na panelu przednim lub GŁOŚNOŚĆ +/- przyciski na pilocie.
4.4 Sound Mode Selection
The RX-5000R offers various sound modes, including Dolby Surround Pro Logic. Press the TRYB DŹWIĘKU button on the remote control or front panel to cycle through available modes and select the one best suited for your content.
4.5 Tuner Operation (RDS)
Aby słuchać radia:
- Wybierz TUNER wejście.
- Naciskać ZESPÓŁ to select FM or AM.
- Użyj Strojenie +/- przyciski do ręcznego dostrojenia się do stacji lub AUTOMATYCZNE STROJENIE aby skanować stacje.
- To store a station, press PAMIĘĆ, następnie użyj USTAWIENIA PRESET +/- wybierz numer wstępnie ustawionego numeru i naciśnij PAMIĘĆ again to confirm. The receiver supports up to 30 FM and 15 MW/LW presets.
- Ten RDS (Radio Data System) feature, if available on the broadcast, will display station information such as program type or station name.
5. Konserwacja
Proper care and maintenance will ensure the longevity and optimal performance of your JVC RX-5000R AV Receiver.
- Czyszczenie urządzenia: Disconnect the power cord before cleaning. Use a soft, dry cloth to wipe the exterior surfaces. Do not use abrasive cleaners, waxes, or solvents as they may damage the finish.
- Wentylacja: Regularly check that the ventilation openings are not obstructed by dust or debris. Blocked vents can lead to overheating.
- Przewód zasilający: Inspect the power cord periodically for any signs of damage. If damaged, contact qualified service personnel for replacement.
- Składowanie: Jeśli urządzenie będzie przechowywane przez dłuższy czas, należy odłączyć je od gniazdka zasilania i przechowywać w chłodnym, suchym miejscu, z dala od bezpośredniego światła słonecznego i ekstremalnych temperatur.
6. Rozwiązywanie Problemów
Before contacting service personnel, please refer to the following table for common issues and their solutions.
| Problem | Możliwa przyczyna | Rozwiązanie |
|---|---|---|
| Brak zasilania | Przewód zasilający nie jest prawidłowo podłączony. Gniazdo zasilania jest nieaktywne. | Ensure the power cord is firmly plugged into the receiver and the wall outlet. Sprawdź gniazdko za pomocą innego urządzenia. |
| Brak dźwięku | Wybrano nieprawidłowe wejście. Speaker wires are loose or incorrectly connected. Głośność jest zbyt niska lub wyciszona. Source device is not playing or has low volume. | Wybierz prawidłowe źródło sygnału wejściowego. Check all speaker connections for correct polarity and secure fit. Increase volume and check if MUTE is active. Ensure the source device is playing and its volume is adequate. |
| Słaby odbiór radia | Antena nie jest prawidłowo podłączona lub ustawiona. Zakłócenia ze strony innych urządzeń elektronicznych. | Adjust the position and orientation of the FM and AM antennas. Move the receiver or antennas away from other electronic devices. |
| Pilot nie działa | Baterie są rozładowane lub nieprawidłowo włożone. Przeszkoda pomiędzy pilotem a odbiornikiem. | Wymień baterie na nowe, zwracając uwagę na prawidłową biegunowość. Remove any obstacles and ensure the remote is pointed at the receiver's sensor. |
7. Specyfikacje
Dane techniczne mogą ulec zmianie bez powiadomienia.
- Model: JVC RX-5000R
- Moc wyjściowa: 100 Watts per channel (5 channels)
- Kanały audio: Dźwięk przestrzenny 5.1
- Konfiguracja dźwięku przestrzennego: 5.1
- Tryb wyjścia audio: Otaczać
- Technologia łączności: Optical, Coaxial, 3.5 mm jack (for audio inputs)
- Wejścia audio: 5 Analog Audio Inputs, 5.1 Channel Analog Input, Digital Optical, Digital Coaxial
- Tuner: RDS (Radio Data System) compatible FM/AM tuner
- Ustawienia tunera: 30 FM, 15 MW/LW
- Typ sterowania: Push button, Remote control
- Zgodne urządzenia: Television, CD players, DVD players, etc.
- Producent: JVC
Note: The listed "Aantal HDMI-poorten: 5" in some product data refers to general input count and not necessarily HDMI video ports for this model. This receiver primarily handles audio and older video signals via analog connections.
8. Gwarancja i obsługa klienta
JVC products are manufactured to the highest quality standards. For warranty information, please refer to the separate warranty card included with your product or visit the official JVC webwitryna dla Twojego regionu.
For technical assistance, troubleshooting beyond this manual, or service inquiries, please contact JVC customer support. Contact details can typically be found on the official JVC webmiejscu lub w opakowaniu produktu.
When contacting support, please have your model number (RX-5000R) and serial number ready.